Self-Hosting SearXNG for OSINT: Why and How

When you investigate, your search engine is part of your toolchain. Most OSINT practitioners spend more time in Google than in any specialized tool, and yet most of us pay almost no attention to what that means for the work.
Google profiles you. It personalizes results based on your history. It hides things behind soft filters you can't see. And your query stream IS your investigation pattern. A leaked Google account history is a complete timeline of who you've been looking into.
SearXNG fixes all of that. It's a self-hosted metasearch frontend that runs your queries across 70+ engines in parallel and returns the aggregate result. No tracking, no personalization, no central party that holds your investigation history. You host it, you own the data, you decide what it indexes.
This post walks through why it matters for OSINT specifically and how to set up a production-ready instance in about an hour.
Why SearXNG Matters for OSINT
1. Personalization is silently rewriting your evidence
Google's results page is not a view of "what's on the web." It's a view of what Google thinks you want to see, filtered through your account history, browser fingerprint, IP geolocation, time of day, and a dozen other signals. For consumer queries that's fine. For investigations it's a problem, because two analysts running the same query on the same target will see different results. You don't know what you're missing.
SearXNG sends each query to the underlying engines with no user state attached. Different machines hitting your instance get the same results for the same query. That's table stakes for repeatable investigative work.
2. Your query stream is operationally sensitive
If you're investigating a scam ring, a sanctions evader, or a hostile actor, every query you run is a small signal. Google holds those signals. So does DuckDuckGo, despite their marketing. So does Brave. Anyone your queries flow through is a party that knows what you're looking at.
A self-hosted SearXNG splits the fingerprint. Your queries go to dozens of engines in parallel through your VPS IP, none of which can see the full picture. They see a single query from a search-proxy host, not your laptop, not your office IP, not your history.
For stronger fingerprint isolation, you can route SearXNG's outbound requests through residential proxies. SearXNG supports outbound HTTP, HTTPS, and SOCKS proxies via the outgoing.proxies block in settings.yml, applied either globally or per-engine. Pair that with a rotating residential proxy provider and every query to every engine arrives from a different residential IP. Your VPS becomes a coordination layer that issues searches through a rotating cast of residential exits, none of which can be correlated back to either your VPS or your investigation pattern.
This is worth the complexity when you're hammering an engine that bot-detects aggressively (Google and Yandex do, Bing less so) or when your investigation is sensitive enough that the upstream engines simply knowing "this datacenter IP is doing OSINT" is itself a signal you'd rather not leak.
Configuration is straightforward. Per-engine routing in settings.yml:
outgoing:
  proxies:
    https://www.google.com: socks5h://user:pass@residential-host:port
    https://yandex.com: socks5h://user:pass@residential-host:port
The socks5h scheme (vs plain socks5) tells the proxy to resolve hostnames remotely, which keeps your VPS's DNS resolver out of the picture too. Small detail, real OPSEC win.
A few honest caveats. Residential proxy services aren't free; budget at least $5-$15 per GB with reputable providers (Decodo, Bright Data, IPRoyal, Oxylabs). Free residential proxies are almost universally either malware-infected nodes or services selling your traffic on the side, so they aren't an option for OSINT work where output integrity matters. The residential proxy market also has ethical issues worth knowing about: some providers acquire residential IPs through bundled SDKs in free apps, meaning the actual residential users don't realize they're acting as exit nodes. Pick a provider with a clear consent model as part of your due diligence.
For more about Residential Proxies:
3. Different engines surface different evidence
Google is the default for everyone, which is exactly why you shouldn't rely on it alone. For OSINT:
- Yandex has the best reverse image search by a wide margin. It will find faces and objects that Google misses entirely.
- Baidu is the only engine that meaningfully indexes Chinese-language content.
- Brave Search runs its own independent crawl and surfaces results the big engines have demoted.
- Mojeek runs a small independent index that catches a lot of low-traffic personal sites.
- Marginalia explicitly looks for small, non-SEO-optimized sites. The kind where actual humans write things.
SearXNG queries all of them at once. You get the union, not the intersection.
4. The JSON API turns search into a scripting primitive
This is the single best feature of SearXNG that most users never touch. Enable JSON output, and your search engine becomes a curlable enrichment endpoint:
curl -s -G 'https://search.example.com/search' \
  --data-urlencode 'q=0x1234abcd5678' \
  --data-urlencode 'format=json' \
  -H "User-Agent: Mozilla/5.0" \
  | jq '.results[] | {title, url, content}'
Now you can batch-enrich a list of indicators (wallet addresses, email handles, usernames), pipe search results into a notebook or spreadsheet, set up cron jobs that hit specific queries and notify you when new results appear, or build a "search this across all my saved queries" workflow.
5. Bang shortcuts collapse multi-step workflows
SearXNG inherits DuckDuckGo's bang syntax. A few that earn their keep in OSINT:
!gi targetfor Google Images!yi targetfor Yandex Images, almost always more useful for face and object lookup!wa example.comfor the Wayback Machine!arch example.comfor Archive.today!gh someuserfor GitHub!rdt usernamefor Reddit
Set SearXNG as your browser's default search engine and these become one-keystroke jumps from your address bar.
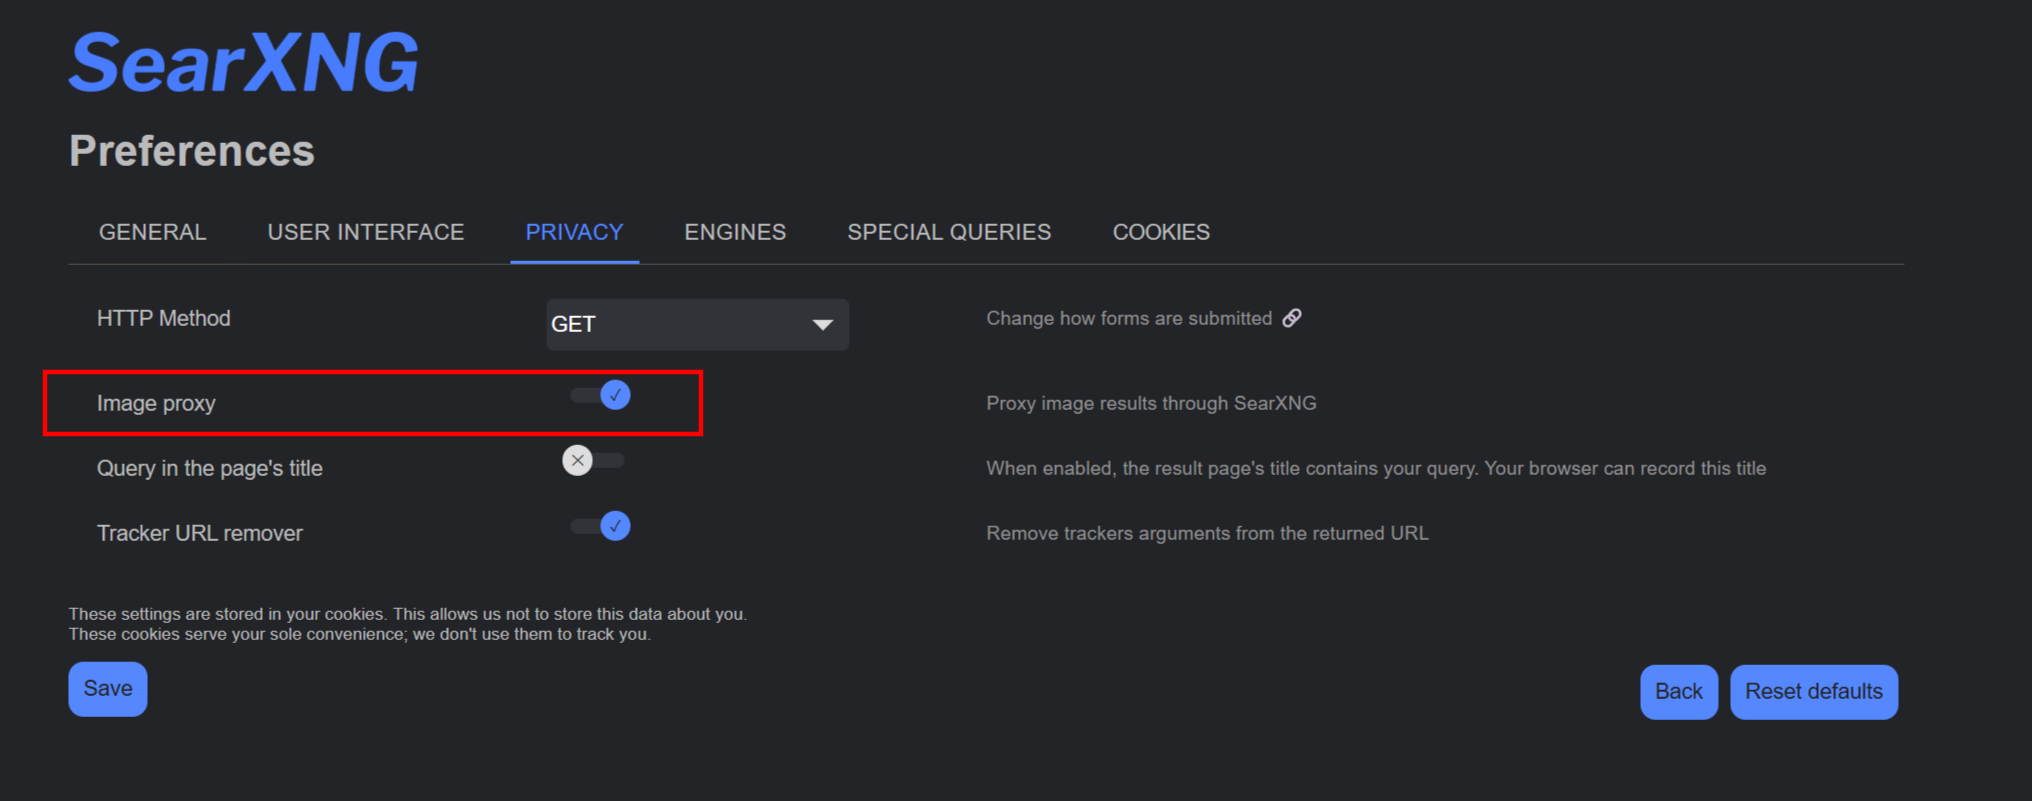
6. Image proxy hides your IP from target servers
In SearXNG settings, image_proxy: true routes image requests through your SearXNG server. When you load search result images, the target site sees your VPS IP, not your client IP. For OSINT against operationally aware adversaries (scam sites that fingerprint visitors, for example), this matters.
The Setup
The whole thing fits in a Docker Compose file, a Caddyfile, and a small YAML config. Everything below assumes a fresh Debian or Ubuntu VPS with a domain you control.
On my box, there is one additonal container for changedetection, a topic for another article entirely:

A note on the alternative path. Michael Bazzell at IntelTechniques is the go-to reference in this space and a writer worth following if you do OSINT or privacy work generally. His July 2025 piece, "Extreme Privacy Update: Self-Hosted SearXNG Guide", covers the laptop-local install on Linux and macOS, framed around the privacy benefit of querying "without trusting any third-party middle man." His approach keeps everything on your machine but means SearXNG is only up when your laptop is. The VPS setup below trades that local-only purity for always-on access from any device and a scriptable JSON API. Both are valid choices. If you're newer to operational privacy, his Extreme Privacy book series is required reading.
Prerequisites
- A VPS with at least 1GB RAM (SearXNG itself is light, but with Redis you want some headroom)
- A domain or subdomain pointing at the VPS (
search.yourdomain.com) - Docker and Docker Compose installed
- Ports 80 and 443 open
A note on provider choice. For OSINT work specifically, I'd push back against the default impulse to grab a DigitalOcean or AWS box. If you're self-hosting search because you don't want US-jurisdiction services seeing your queries, putting the underlying infrastructure on a US provider undoes most of that win. I host all my OSINT tooling on OVHcloud, a French provider whose non-US entity is structurally separated from US legal compulsion, so workloads outside their US datacenters are not subject to the Cloud Act or FISA. I wrote up the case for OVH in detail in a separate post covering their sovereignty story, vertically integrated infrastructure, and why I migrated my Azure workloads to them. Hetzner (Germany) and Scaleway (France) are equally reasonable European choices. The point is consistency: don't host your anti-US-surveillance tooling on a US provider.
If Docker isn't on the box yet:
curl -fsSL https://get.docker.com | sh
sudo usermod -aG docker $USER
newgrp docker
Step 1: Create the project directory
sudo mkdir -p /opt/searxng/searxng
sudo chown -R $USER:$USER /opt/searxng
cd /opt/searxng
Step 2: Create the Compose file
/opt/searxng/docker-compose.yml:
services:
  redis:
    image: redis:7-alpine
    container_name: searxng-redis
    restart: unless-stopped
    volumes:
      - redis-data:/data
    networks:
      - searxng

  searxng:
    image: searxng/searxng:latest
    container_name: searxng
    restart: unless-stopped
    depends_on:
      - redis
    volumes:
      - ./searxng:/etc/searxng:rw
    environment:
      - SEARXNG_BASE_URL=https://search.yourdomain.com/
    ports:
      - "127.0.0.1:8080:8080"
    networks:
      - searxng
    cap_drop:
      - ALL
    cap_add:
      - CHOWN
      - SETGID
      - SETUID
      - DAC_OVERRIDE

volumes:
  redis-data:

networks:
  searxng:
Change SEARXNG_BASE_URL to your actual domain.
Binding to 127.0.0.1:8080 is intentional. The only public surface for this stack is your reverse proxy on 443.
Step 3: Create the SearXNG settings file
/opt/searxng/searxng/settings.yml:
use_default_settings: true

general:
  instance_name: "search.yourdomain.com"
  privacypolicy_url: false
  donation_url: false
  contact_url: false
  enable_metrics: false

server:
  secret_key: "GENERATE_ME"
  limiter: true
  image_proxy: true
  method: "GET"

ui:
  static_use_hash: true
  default_theme: simple
  theme_args:
    simple_style: dark

redis:
  url: redis://redis:6379/0

search:
  safe_search: 0
  autocomplete: "duckduckgo"
  default_lang: "en"
  formats:
    - html
    - json
    - csv
Now generate the secret key:
sed -i "s|GENERATE_ME|$(openssl rand -hex 32)|" searxng/settings.yml
A few notes on what's in here. limiter: true blocks bots and scripted abuse via Redis-tracked rate limiting. image_proxy: true routes image loads through your server for OPSEC. safe_search: 0 disables safe search since you need full results for investigations. formats: json csv enables structured output for the scripting use case.
Step 4: Set up Caddy as reverse proxy
Install Caddy:
sudo apt install -y debian-keyring debian-archive-keyring apt-transport-https curl
curl -1sLf 'https://dl.cloudsmith.io/public/caddy/stable/gpg.key' \
  | sudo gpg --dearmor -o /usr/share/keyrings/caddy-stable-archive-keyring.gpg
curl -1sLf 'https://dl.cloudsmith.io/public/caddy/stable/debian.deb.txt' \
  | sudo tee /etc/apt/sources.list.d/caddy-stable.list
sudo apt update && sudo apt install -y caddy
Create /etc/caddy/Caddyfile:
search.yourdomain.com {
    reverse_proxy 127.0.0.1:8080
    encode gzip zstd
}
Validate and reload:
sudo caddy validate --config /etc/caddy/Caddyfile
sudo systemctl reload caddy
Caddy will fetch a Let's Encrypt cert automatically the first time you load the URL.
Step 5: Start the stack
cd /opt/searxng
docker compose up -d
docker compose logs --tail 30
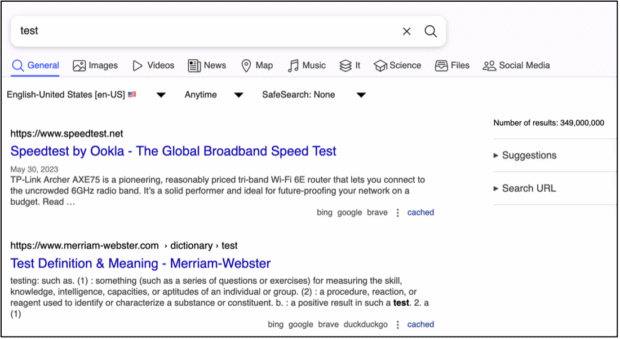
Wait about 10 seconds for SearXNG to initialize, then hit https://search.yourdomain.com in a browser. You should see the SearXNG search page.
Step 6: Verify the JSON API
curl -s -H "User-Agent: Mozilla/5.0" \
  -H "Accept: application/json" \
  'https://search.yourdomain.com/search?q=test&format=json' \
  | jq '.results[0]'
You should get a JSON result back. If the limiter blocks you (status 429), add your client IP to botdetection.ip_lists.pass_ip in settings.yml:
botdetection:
  ip_lists:
    pass_ip:
      - YOUR.IP.HERE/32
Then docker compose restart searxng.
Step 7: Tune for OSINT use
A few configuration tweaks worth making at this stage.
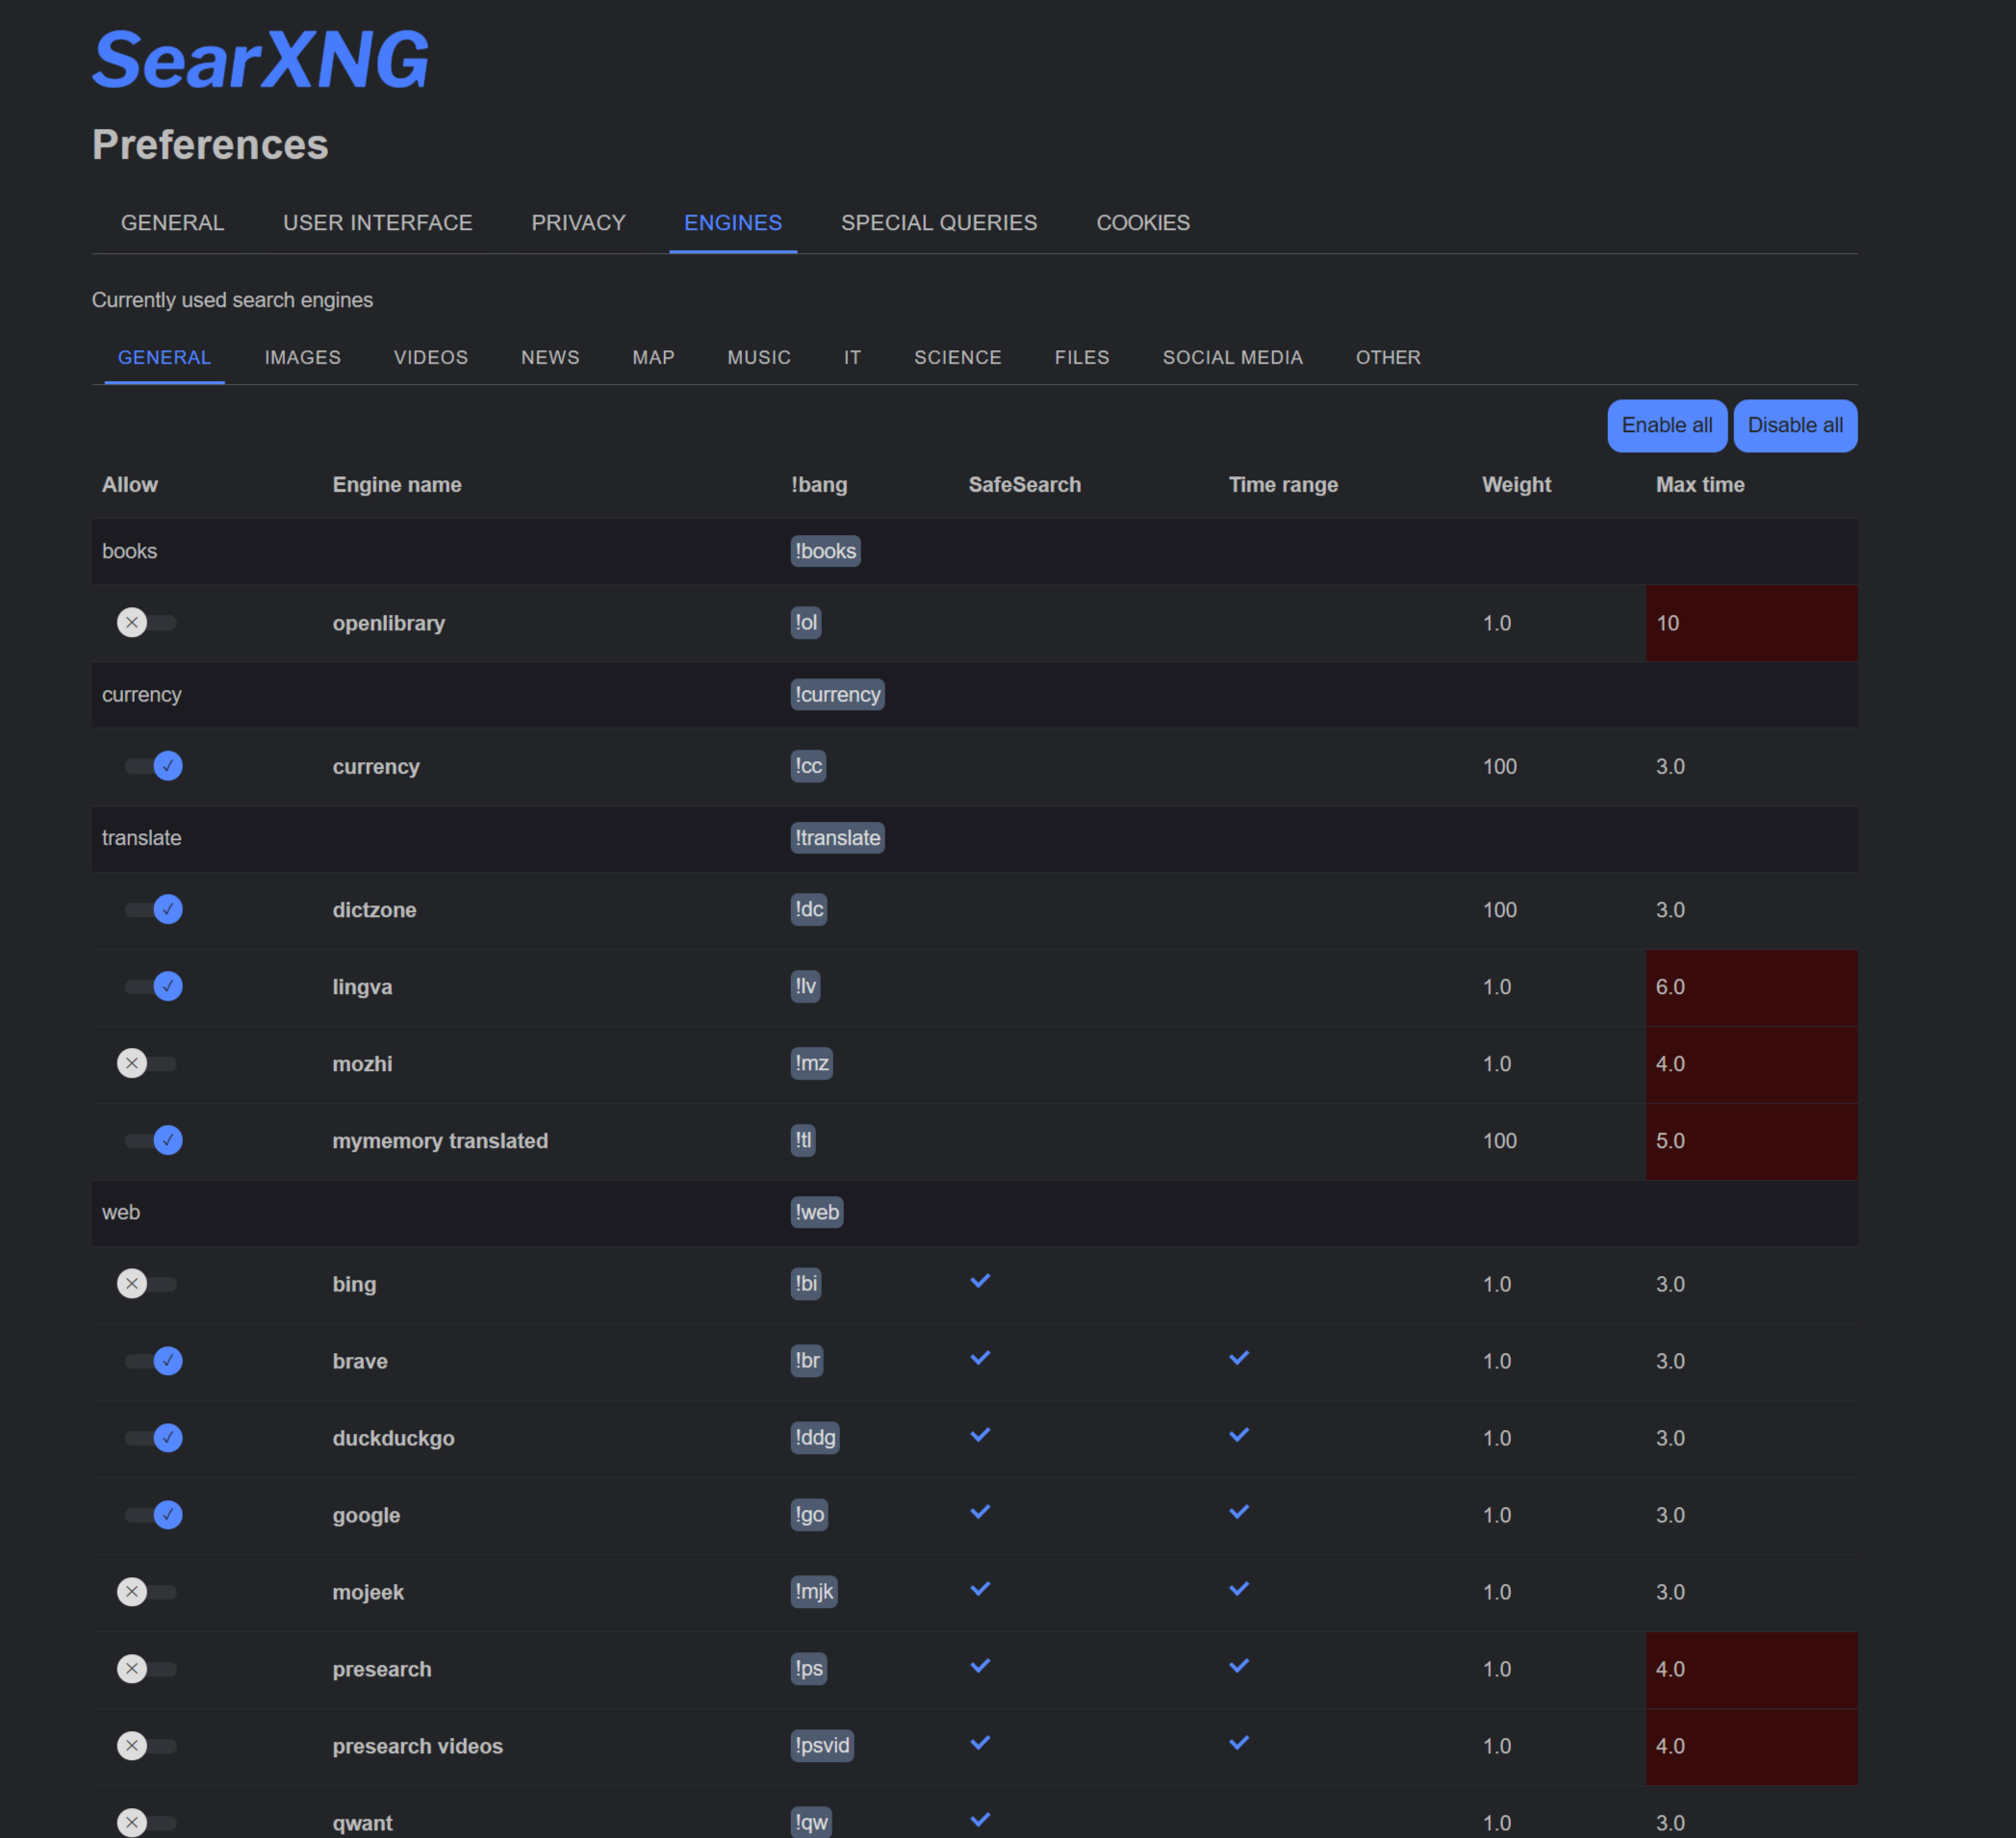
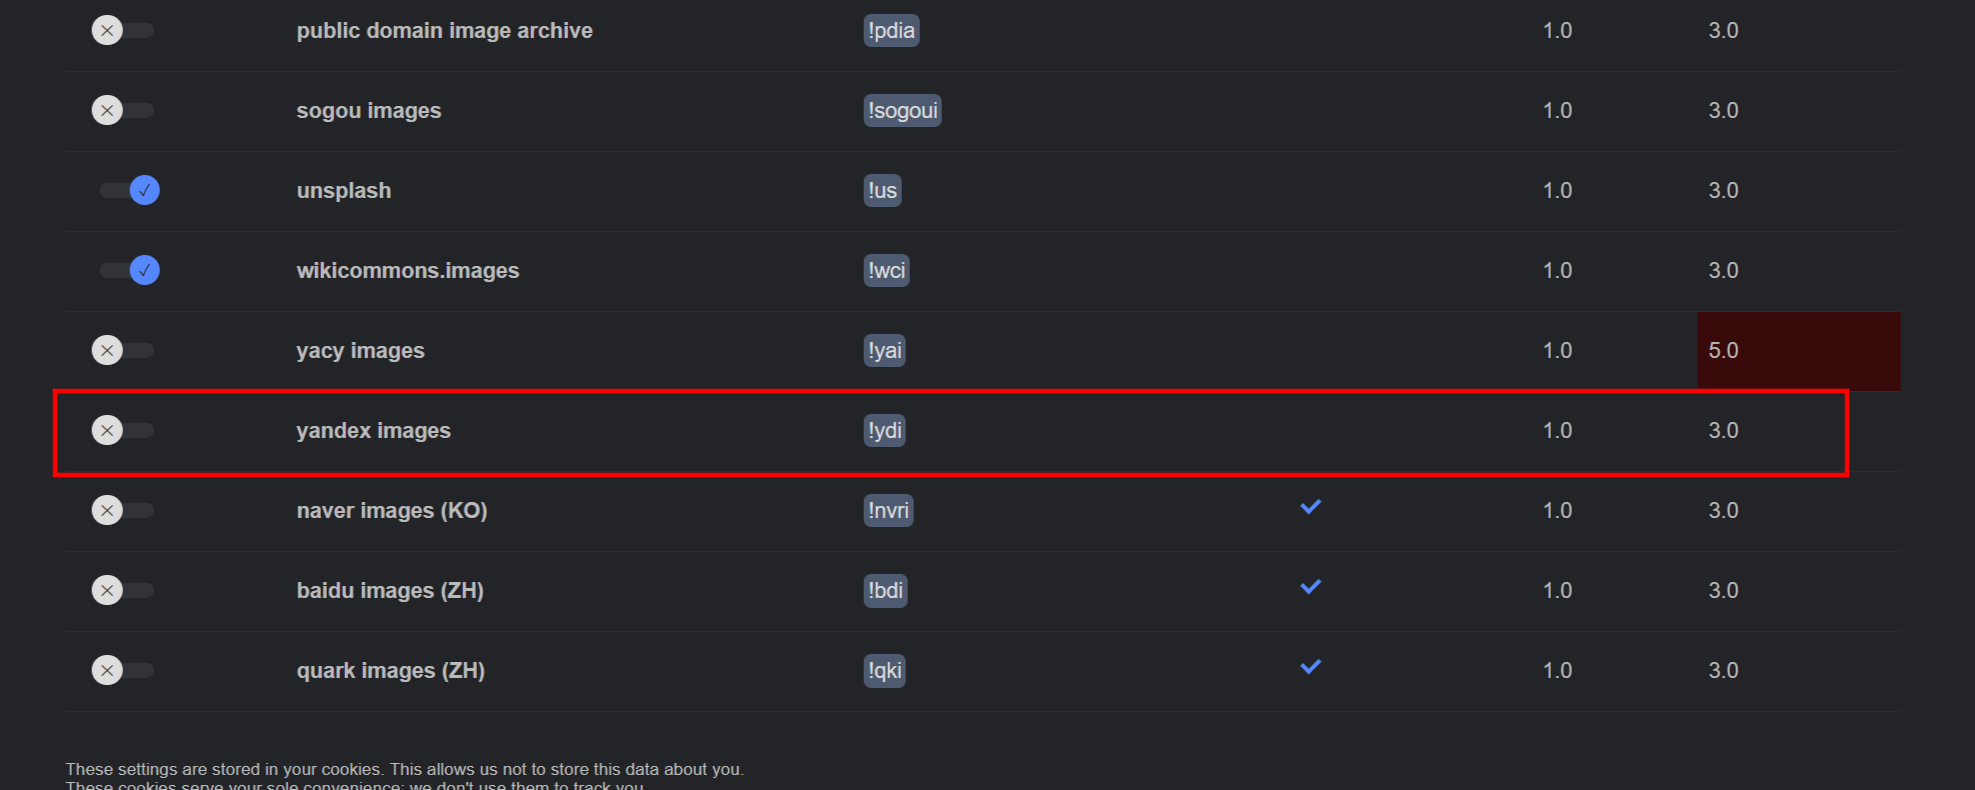
Enable additional engines. Out of the box, SearXNG enables a sensible default set. For OSINT you specifically want Yandex Images on. In the settings UI (the wrench icon, top right), under "Engines," ensure Yandex is on. Also turn on Brave, Mojeek, and Marginalia under General.
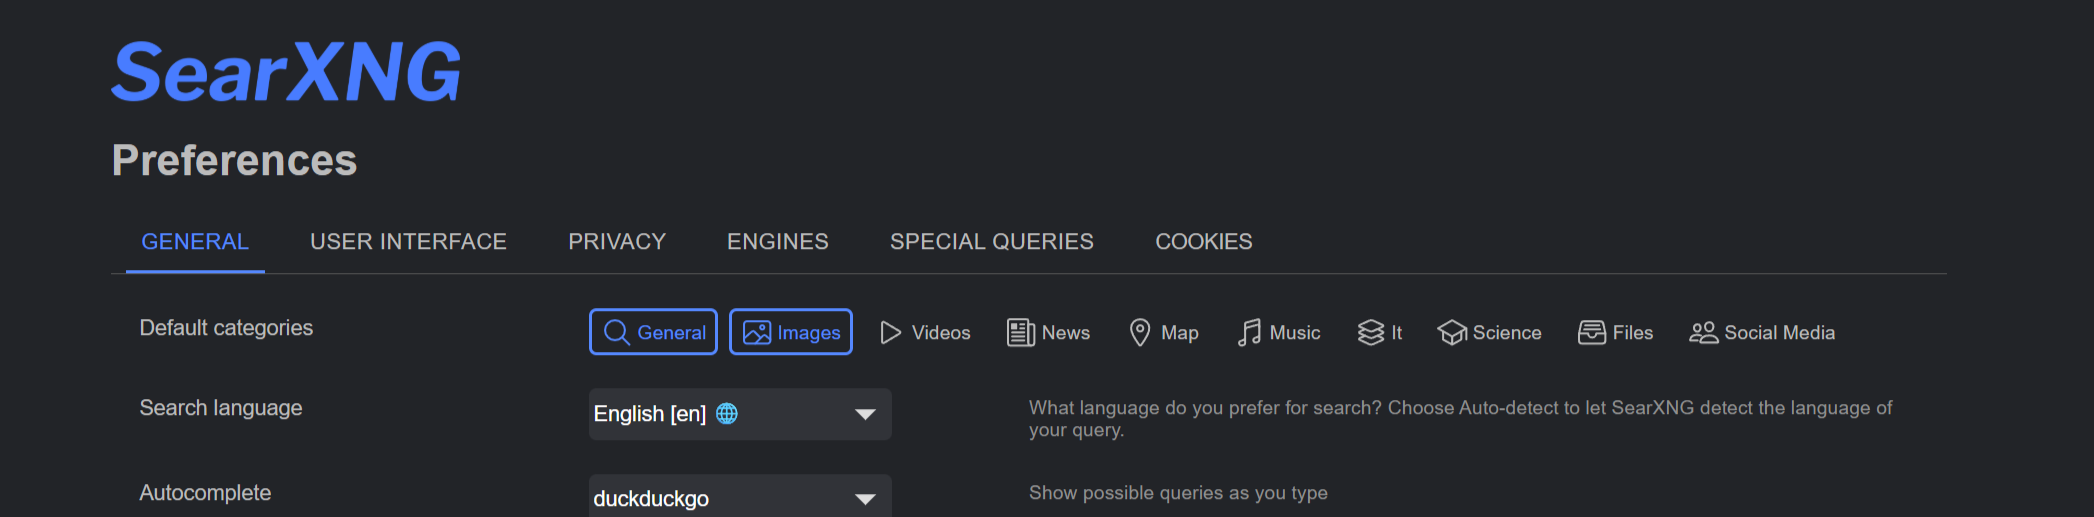
Set your search categories. Under Preferences → Search, set the default search categories that match your work. For most OSINT work, "General" and "Images" are the right defaults.
Set as default browser search. In Firefox or Chrome, right-click the search bar and add SearXNG as a search engine. Now address bar queries route through your own instance.
Locking Down Access (Optional but Recommended)
By default, anything served at search.yourdomain.com is publicly accessible. If someone finds the URL, they can use your instance for free. And they will find it eventually. Every Let's Encrypt certificate ends up in public certificate transparency logs that anyone can grep, so "I just won't share the URL" is not a real defense against discovery.
This entire section is technically optional. SearXNG works fine as a public instance, and the built-in rate limiter blocks obvious abuse. But on a personal VPS that's running searches you actually care about, leaving it wide open creates a few problems worth thinking about.
Why this matters
Your VPS IP carries all queries. Every search someone runs through your instance hits the upstream engines (Google, Bing, DuckDuckGo, Yandex) from your VPS IP. If random people start running thousands of queries through your instance, those engines see a high-volume scraper and start rate-limiting your IP. Your own searches then start hitting CAPTCHAs and 429s. The upstream rate limit is shared across everyone using your box.
Resource consumption. Less critical on a healthy VPS than the upstream rate limit problem, but if your instance gets popular or abused, your bandwidth and CPU are going toward serving strangers.
Attribution. Without authentication, you have no way to attribute queries to specific users. If someone uses your instance to do something problematic, the only thing visible (to you, and to law enforcement if it ever comes to that) is your VPS IP. You become the responsible party for someone else's searches.
Configuration exposure. Some SearXNG configuration is visible to anyone with access: engine list, preferences UI, instance statistics. Not catastrophic, but it does give a curious visitor information about your setup, and it telegraphs that the URL is worth poking at further.
Investigation pattern leak. This is the OSINT-specific concern. If you're the only user of an instance, every query from that IP at every upstream engine is yours. Multiple authenticated users dilute that. But with a wide-open public instance you can't tell what's yours and what isn't even in your own logs, so attribution becomes meaningless for your own troubleshooting and analysis too.
Your options
- Cloudflare Access. Easiest if you're already on Cloudflare DNS. MFA built in via your identity provider or configurable in Cloudflare. Covered in detail below. Aside from the steps in this article, I wrote about this some time ago, you may find that interesting too:

- IP allowlist in Caddy. Quick and dirty, fine if you only access from a few fixed IPs. Falls apart on mobile networks and when you travel.
- HTTP Basic Auth in Caddy. Simple shared password, no MFA, but easy to set up. Use Caddy's
basic_authdirective. - Self-hosted forward auth (Authelia, Authentik). Open source, MFA-capable, more setup. Worth it if you plan to protect multiple services with the same auth layer.
- Tailscale or WireGuard. Don't expose the site to the public internet at all, access only via a private overlay network. Strongest opsec, but only works from devices you've enrolled. Tailscale is actually what I use generally, I did the Cloudflare Access here to demonstrate it as it is
The rest of this section walks through Cloudflare Access because it's the lowest-effort option with real MFA. One trade-off to know up front: putting SearXNG behind Access will block scripted JSON API access from anywhere not authenticated. You can work around that with Cloudflare Service Tokens later if you need it, but it adds complexity.
Prerequisites
- Domain on Cloudflare DNS (using their nameservers)
- A free Cloudflare Zero Trust account (their dashboard will set this up if you don't have one)
- An identity provider configured (Google Workspace, Microsoft, GitHub, or one-time email PIN all work)
Step 1: Proxy the DNS record
In Cloudflare DNS, find the A record for search and flip the cloud icon from grey to orange. This tells Cloudflare to proxy traffic for that hostname.

Once proxied, all requests hit Cloudflare first, get checked against Access policies, and forward to your origin server only if authorized.
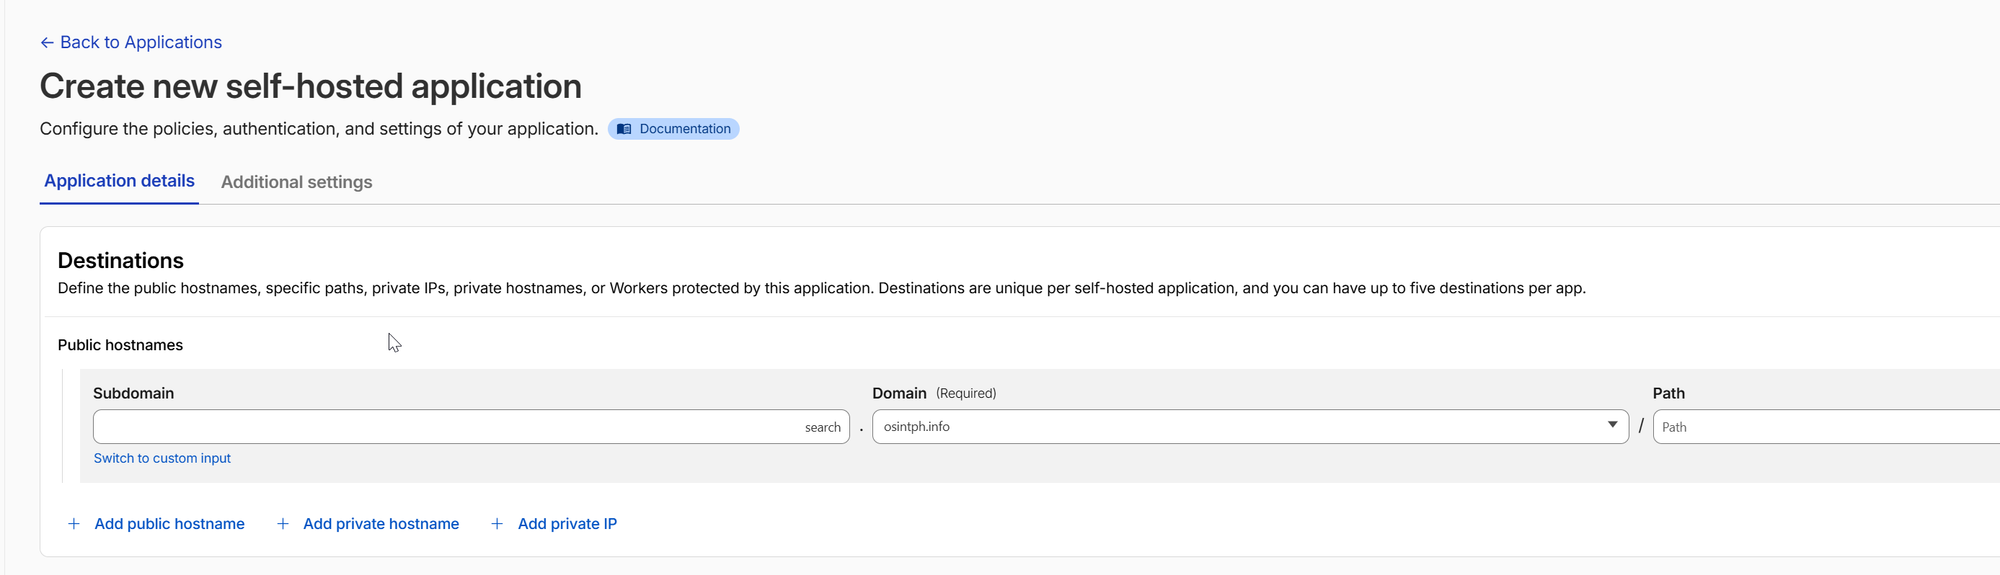
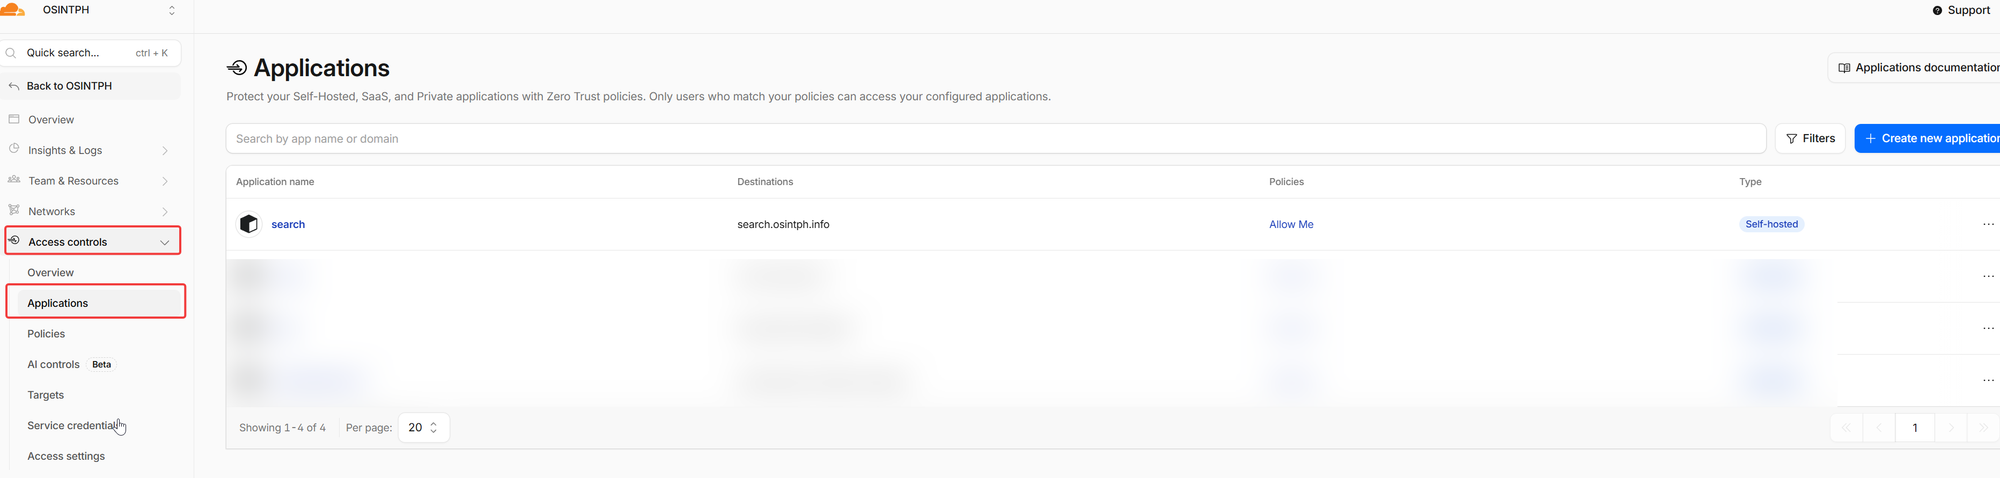
Step 2: Create the Access application
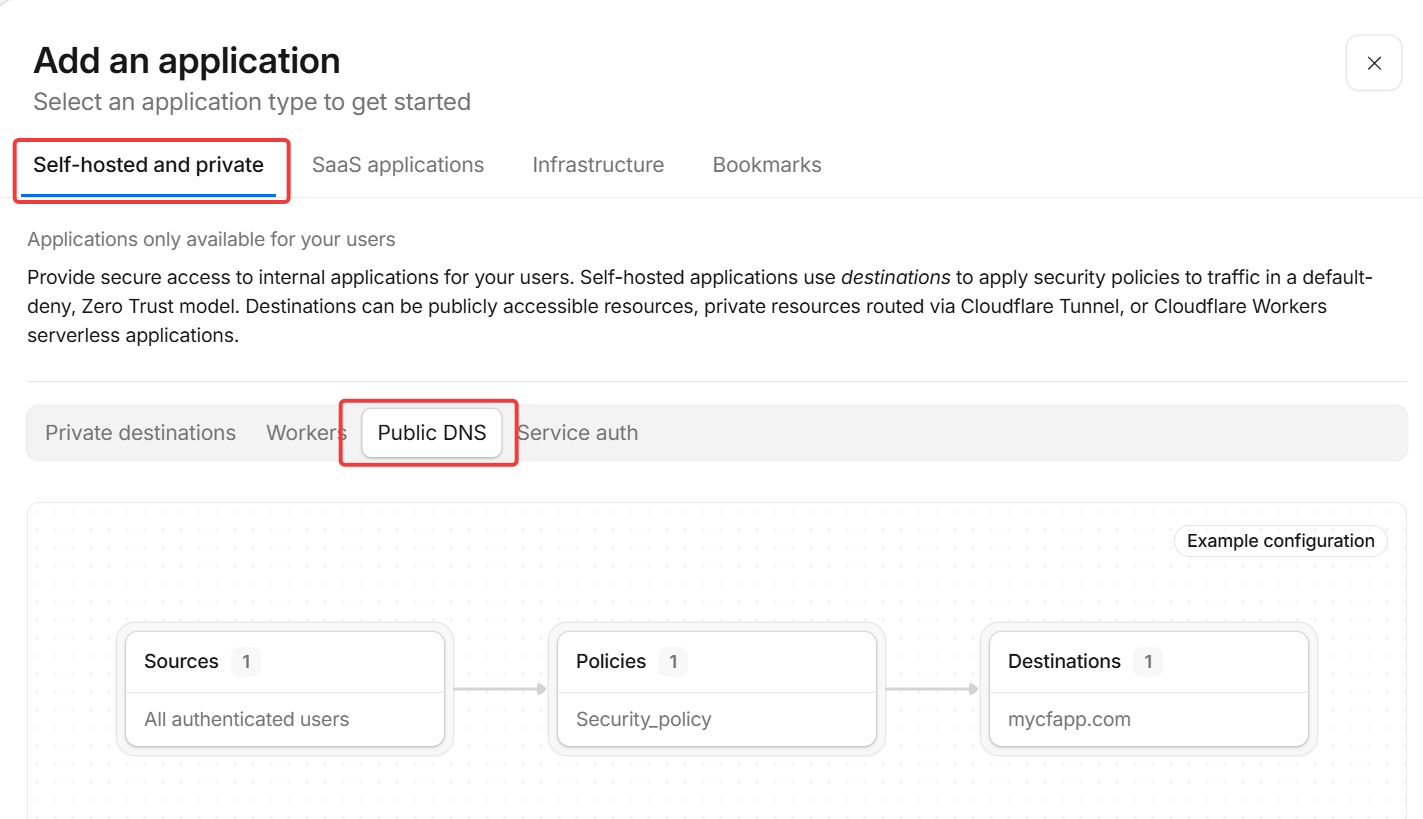
Zero Trust dashboard → Access Controls → Applications → Add an application → Self-hosted.
Settings:
- Application name: SearXNG or whatever you prefer
- Session duration: 24 hours
- Public hostname:
search.yourdomain.com(path field stays empty to protect the entire site)
Step 3: Attach a policy
Add a policy. Include rule: emails matching yours (or your team's). Save.
If you're using Google Workspace as your IdP and Workspace already requires MFA at sign-in, you're already getting MFA on Access logins. Otherwise, add an explicit Require rule for an authentication method that includes MFA.
Personally, i have a workspace account setup, and I use that for authentication:

Step 4: Solve the cert problem
Once Access is in front, Let's Encrypt's HTTP-01 challenge can't reach your origin to renew certs. Two paths.
Option A: Cloudflare Origin Certificate (simpler)
Cloudflare gives you a 15-year cert for your origin that they implicitly trust.
SSL/TLS → Origin Server → Create Certificate. Pick ECDSA, set hostnames to *.yourdomain.com, yourdomain.com, 15-year validity. Save the cert and key, drop them on your server:
sudo mkdir -p /etc/caddy/certs
sudo nano /etc/caddy/certs/origin.pem  # paste the cert
sudo nano /etc/caddy/certs/origin.key  # paste the key
sudo chmod 600 /etc/caddy/certs/origin.key
sudo chown caddy:caddy /etc/caddy/certs/*
Update your Caddyfile to use the static cert:
search.yourdomain.com {
    tls /etc/caddy/certs/origin.pem /etc/caddy/certs/origin.key
    reverse_proxy 127.0.0.1:8080
    encode gzip zstd
}
Reload Caddy. No more ACME renewals to worry about for 15 years.
Option B: DNS-01 challenge (cleaner but more setup)
Build Caddy with the Cloudflare DNS plugin, give it a scoped CF API token, and let it renew via DNS challenge. Better if you'll manage many domains the same way.
Step 5: Verify end to end
In an incognito browser, hit https://search.yourdomain.com. You should see the Cloudflare Access login page, authenticate via your IdP (with MFA if configured), and land on the SearXNG search page.
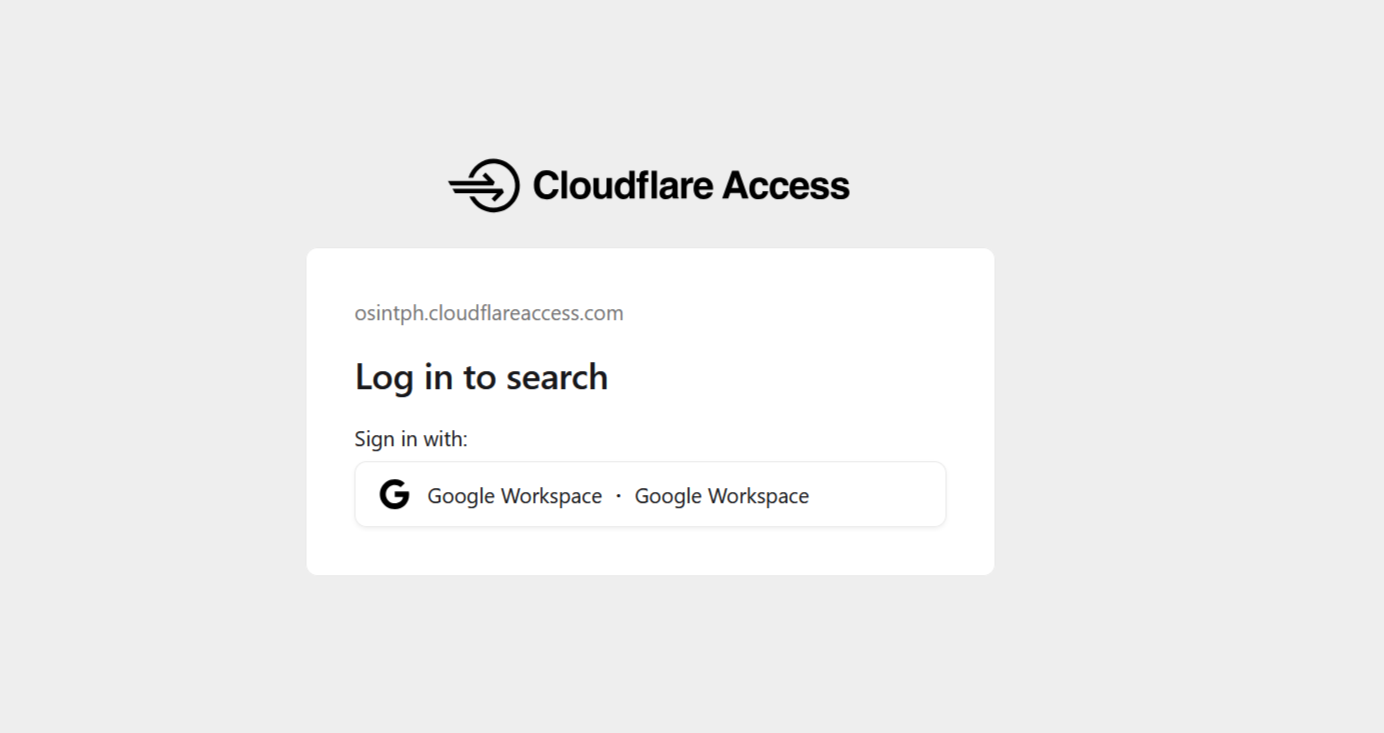
Done. Your search engine is behind enterprise-grade auth, on infrastructure you control, with a 15-year cert.
Practical OSINT Workflows
A few patterns that pay off once SearXNG is set up.
Cross-engine target profiling. Drop a username, real name, or email into your SearXNG instance. Because it queries multiple engines simultaneously, you see what Google, Brave, Mojeek, and others surface separately. Pay attention to results that appear on smaller engines but not Google. Those are often the most useful, because they're less polluted by SEO.
Reverse image investigations. Use !yi for Yandex Images. For a face crop or unique object, Yandex routinely finds matches that Google's reverse image misses by a wide margin. If you only get one thing out of SearXNG, make it this.
Enrichment scripts. Batch a list of indicators through the JSON API. Crypto wallet addresses, email handles, breached usernames, suspicious domains. Pipe results to JSON, parse with jq, structure into your case notes. Example:
while read indicator; do
  echo "## $indicator"
  curl -s -G 'https://search.yourdomain.com/search' \
    --data-urlencode "q=$indicator" \
    --data-urlencode 'format=json' \
    -H "User-Agent: Mozilla/5.0" \
  | jq -r '.results[] | "- [\(.title)](\(.url))"' \
    | head -5
  echo
done < indicators.txt > enrichment.md
Now enrichment.md is a markdown document with the top five search results per indicator, ready to drop into your case notes.
Site-focused investigations. Use site: filters in your SearXNG queries the way you would in Google, but get aggregated results across engines. Useful when investigating a specific forum, paste site, or social platform.
Bang chains for known-target workflows. When investigating something specific, build a habit of running it through several bangs in sequence: !gh for code presence, !yi for image, !wa for historical snapshots, !arch for parallel archives. Five bangs in five seconds covers most of the surface area.
Maintenance
The stack is almost zero-maintenance, but a few things to know.
Updates. Run docker compose pull && docker compose up -d periodically to pick up SearXNG releases. Once a month is fine for most users. Easy to just schedule this via cron.
Logs. SearXNG doesn't log queries by default, which is the whole point. If you want operational logs (response times, errors), they're in docker compose logs searxng. Nothing in there reveals what you searched for.
Engine selection drift. Engines occasionally break or change their HTML structure. SearXNG releases tend to fix these quickly, so the update cadence above keeps things working.
Watch your Redis size. It grows slowly with rate-limiter state. docker compose exec redis redis-cli DBSIZE will tell you. If it ever balloons, FLUSHDB clears it.
Closing
A self-hosted search engine sounds like overkill until you've run a few queries through one and seen what your previous setup was missing. The privacy story is real, but the operational benefit (aggregated results, scripting, sane defaults, bangs) is what makes it stick.
Set it up once, point your browser at it, forget about it for six months. You'll notice the difference the next time you have to use someone else's box and end up back on raw Google.
Reach out if you have questions or comments or what to collaborate
Session Messenger: 059db238ab37c3d92615c5cc24b694da29c598cc13e27886053722404118e14271