
Inside Social Links CrimeWall: A Hands-On Tour of the Platform

OSINT work has a tooling problem. The data is out there (social networks, messengers, blockchains, the dark web, paste sites, breach corpora, public records), but the act of pulling it together still tends to happen across a dozen browser tabs, a notes app, a maltego file, and a spreadsheet someone will lose by the end of the week. Even seasoned analysts spend more time wrangling sources than actually analysing.
Social Links CrimeWall is one of the more ambitious attempts at consolidating that workflow into a single platform. I've had access for about a week now and have started to run some investigations through it. I will follow this post up with walkthroughs of some of those actual investigations in the coming months.
Full disclosure
The Social Links team granted me a full-feature licence. The licence covers the platform.
The analysis, the walkthrough, the things I'd improve, and the opinions throughout are entirely my own. As part of this license, I have agreed to share my feedback to them as well, on things that I think could be omproved or better documented. I make a separate post about that, obviously, I will share my feedback with the SlocialLinks Team first.
Picking a mode
The first decision you make in CrimeWall is which mode to enter. There are four on the selector screen, though not all of them are available to every licence tier.

- OSINT Start. An entry-level mode that automates source pulls for users without prior OSINT experience. Closed beta on my licence at the time of writing
- QuickLink. The fast-lane pre-investigation mode. Available to me, covered in detail below
- Professional. The full investigation workspace. The bulk of this post lives here
- MDRP. A social media and messenger monitoring tool focused on detecting modern threats. Wait list at the time of writing
- Manager Dashboard. A supervisory interface for team leads and licence admins. Requires separate access
I'll focus the walkthrough on QuickLink and Professional, which are the two modes I have full access to, and note honestly when I'm describing a feature from documentation rather than hands-on use.
How CrimeWall thinks about an investigation
Before clicking anywhere, it helps to understand the mental model. CrimeWall organises work in a three-tier hierarchy that you'll see reflected in every menu, panel, and shortcut.
Dataspace. The top-level container. Think of it as the case file or the engagement. Everything related to one investigation lives under a single dataspace.
Project. A folder inside a dataspace that groups related work. One investigation can have several projects: persons of interest, infrastructure, financial flows, social network. You can also create standalone projects outside any dataspace if you want a quick-and-dirty workspace.
Document. The actual canvas. This is where you collect, visualise, and analyse data. Each project can hold many documents, and each document is independently viewable as a graph, table, map, or content view.
Inside a document you work with elements, which are either objects (a person, a wallet, a domain, an account) or connections (the relationships between them). Every object and connection carries properties, which is just data attached to it (a name, an email, a registration date).
You change the world inside a document by running methods. Methods come in three flavours: collectors that pull data from a specific source, processors that transform what you already have (image detection, deduplication, classification), and scripts that chain multiple methods into a reusable pipeline.
That's the whole vocabulary. Dataspace, project, document, element, property, method. Everything else in the UI is just a different way of looking at those six things.
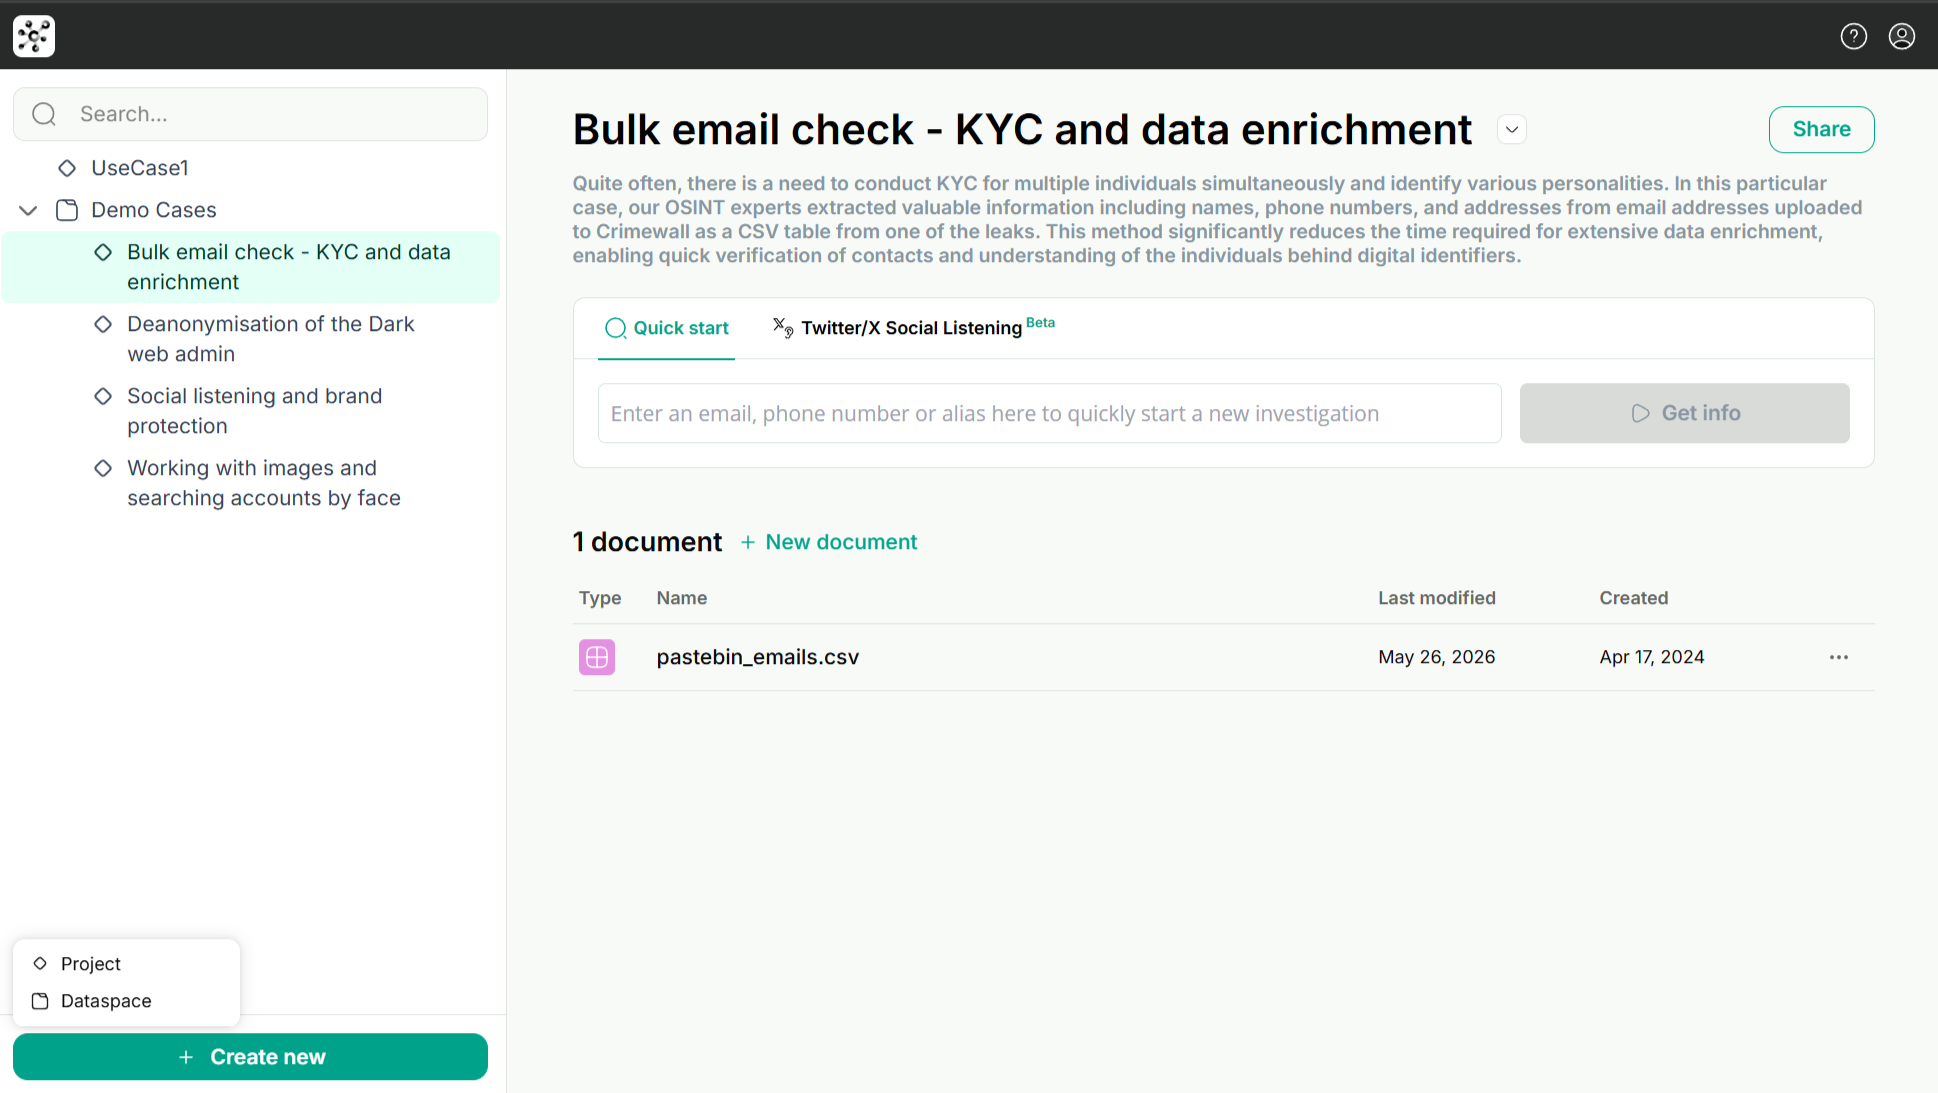
A shortcut for learning the platform: Demo Cases
Before going further, one thing worth knowing: every CrimeWall licence ships with a set of Demo Cases in the Documents panel. These are pre-built investigations you can open, explore, and reverse-engineer. At time of writing, mine includes:
- Bulk email check for KYC and data enrichment
- Deanonymisation of a Dark Web admin
- Social listening and brand protection
- Working with images and searching accounts by face
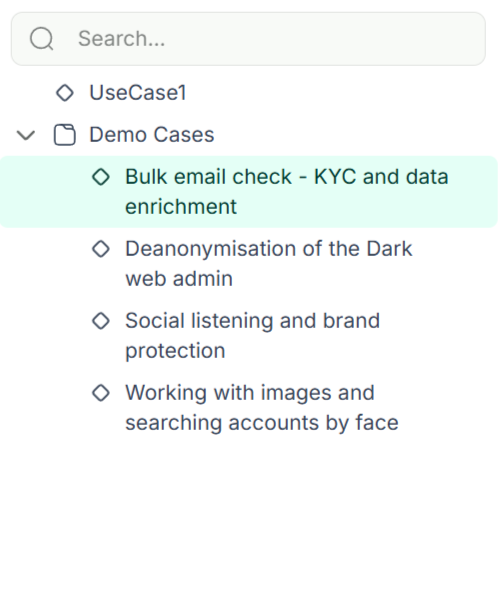
If you're new to the platform, open these before you build your first real investigation. Each one is a working document you can pan around, inspect the methods that were used, see how the graph was structured, and understand how a finished case is presented. The dark web admin deanonymisation is particularly instructive because it shows how multiple darknet sources, identity mappings, and pivot points fit together.
I'll borrow some structural ideas from these throughout the post.
Two ways to start: QuickLink or Professional Mode
CrimeWall splits investigations into two operating modes, and choosing the right one matters because they target different stages of the workflow.
QuickLink Mode: the five-minute triage
QuickLink is the fast lane. You feed it one identifier (username, email address, or phone number), and it runs a parallelised sweep across roughly 270 sources, then synthesises everything into a structured report.
What you get at the end:
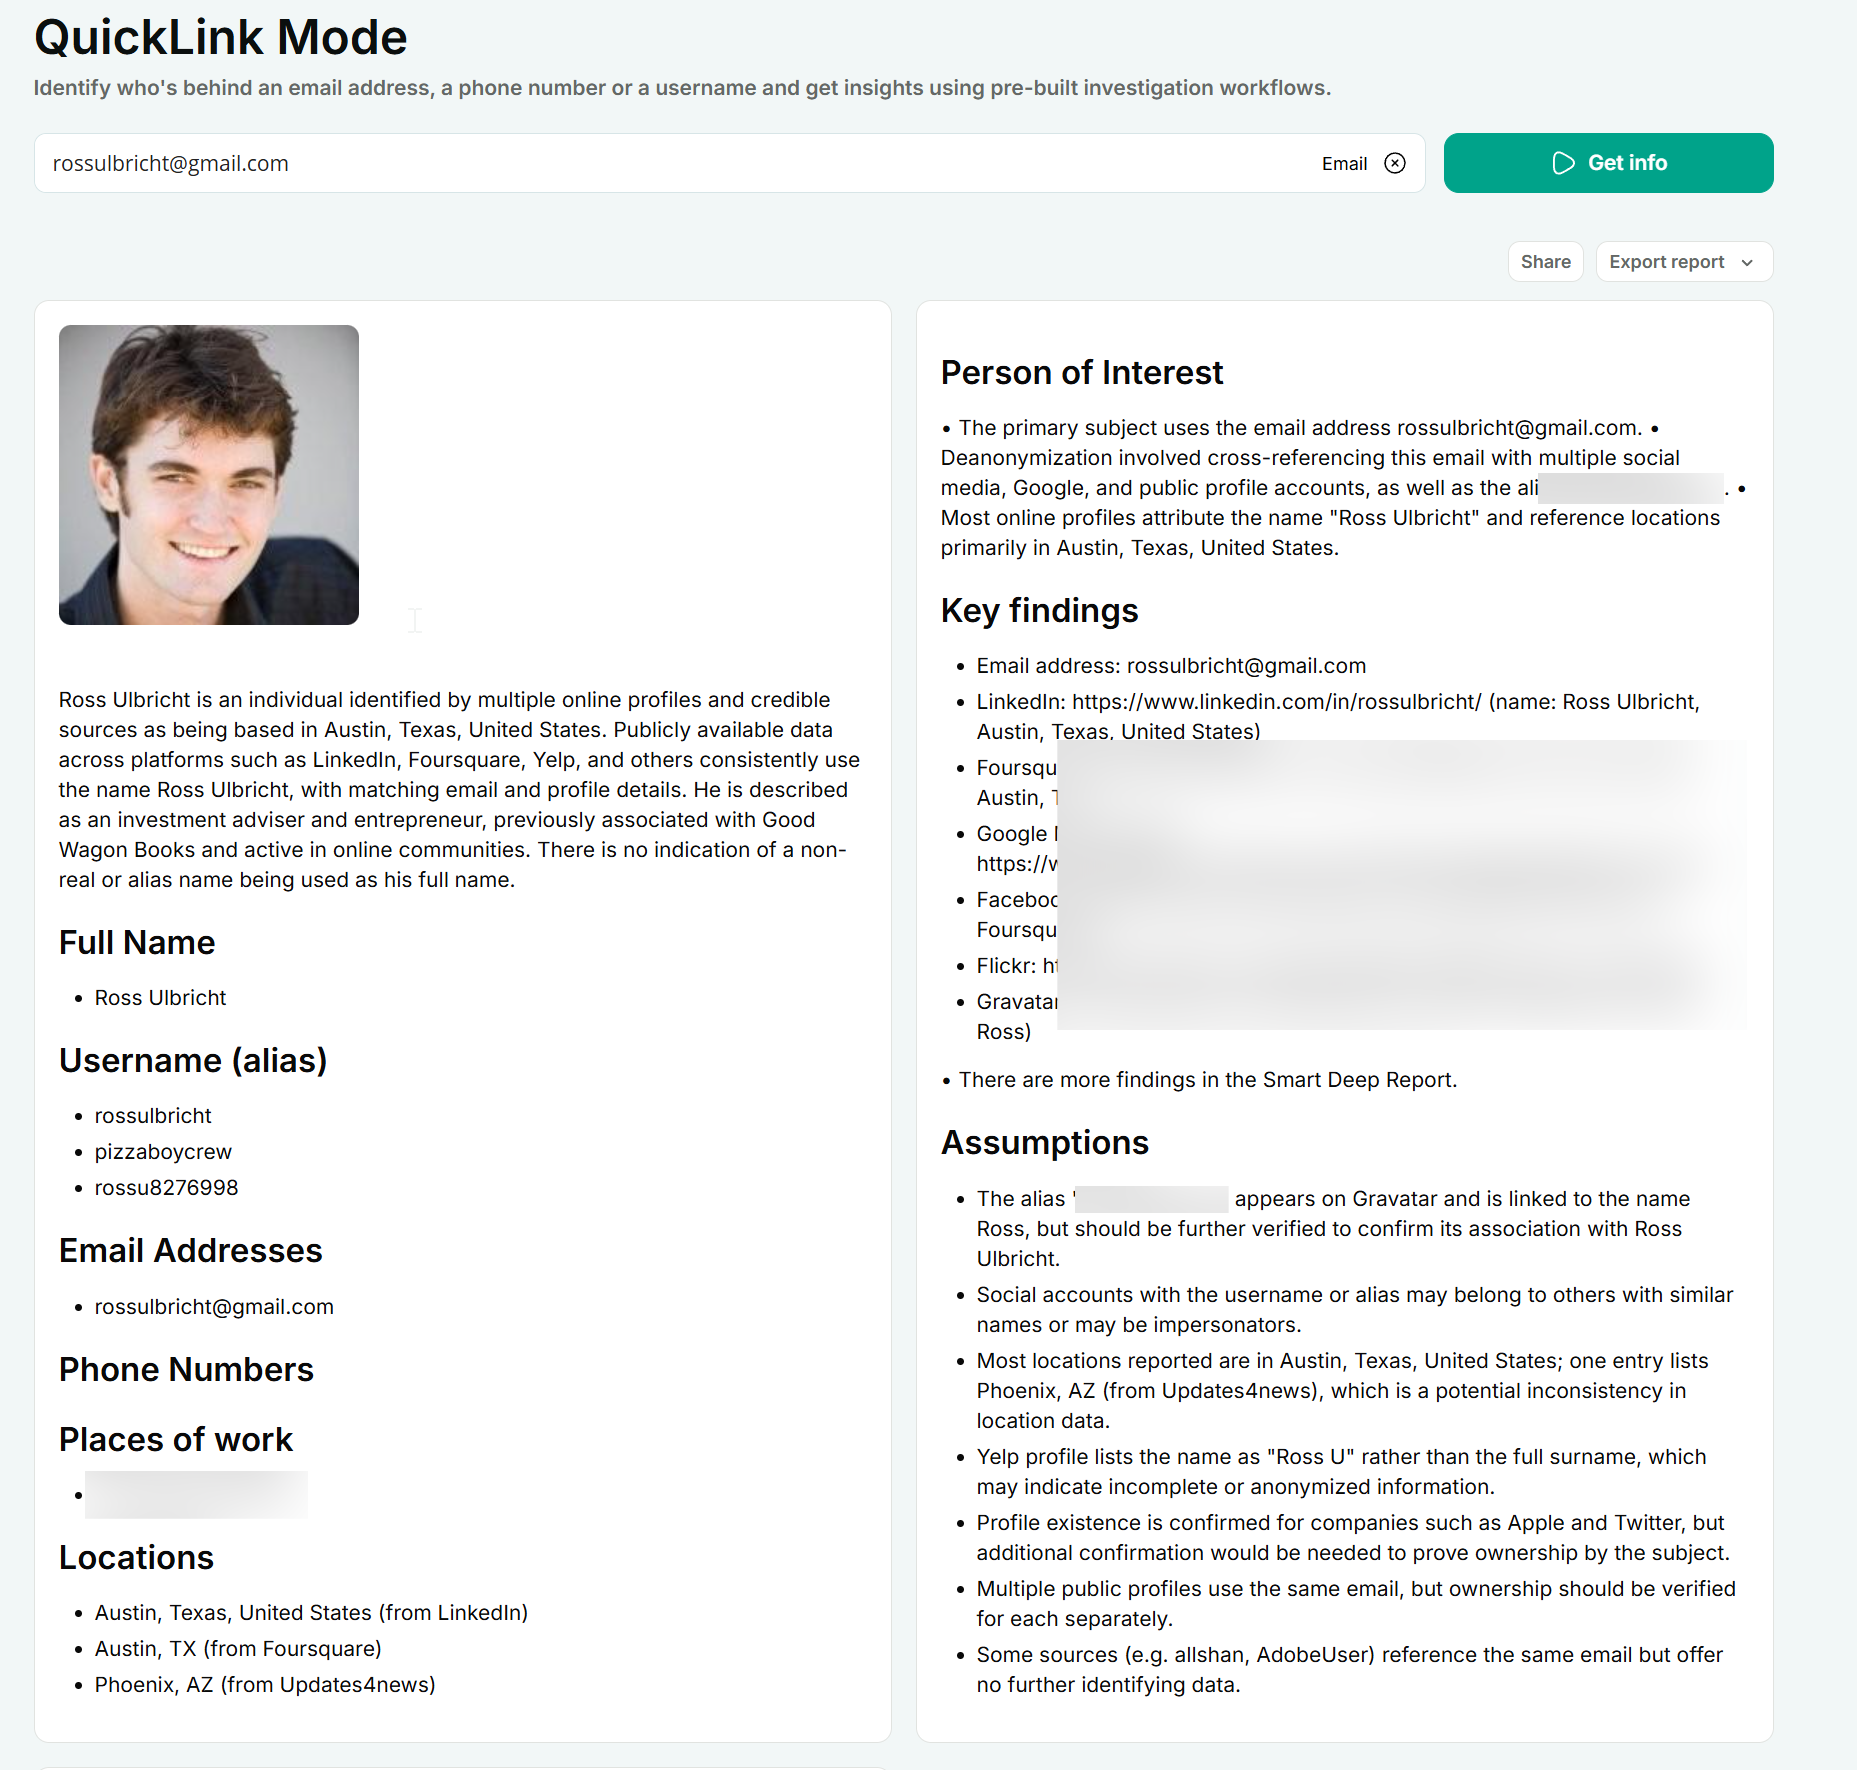
- A Smart Summary with a profile image, a short synthesised description, key findings, and an explanation of how those findings were derived
- Structured sections for names, emails, phone numbers, locations, and workplaces
- A Notable Data Points widget that surfaces the high-signal identifiers as they come in (usernames, aliases, possible real names, locations)
- A Results by Category section grouping entities by source type
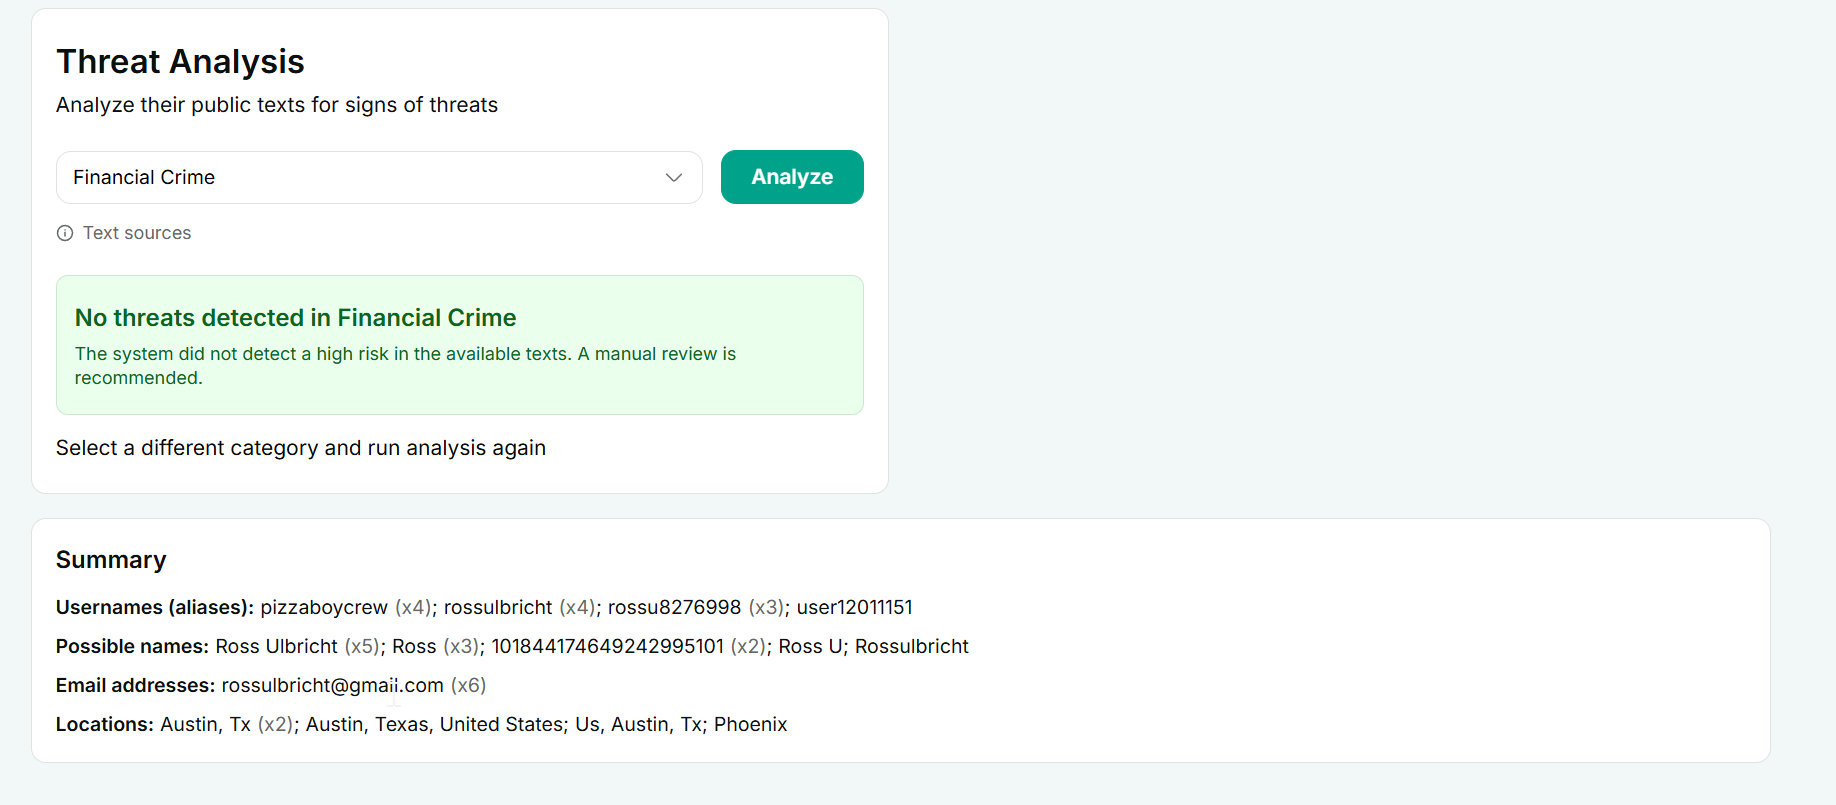
- An optional Threat Classification pass that screens a target's social posts for indicators across seven categories: Physical Violence, Cyber Attack, Financial Crime, Disinformation, Espionage, Organized Crime, and Reputation Attack
- An exportable PDF report and an option to request a Smart Deep Report for more analytical depth
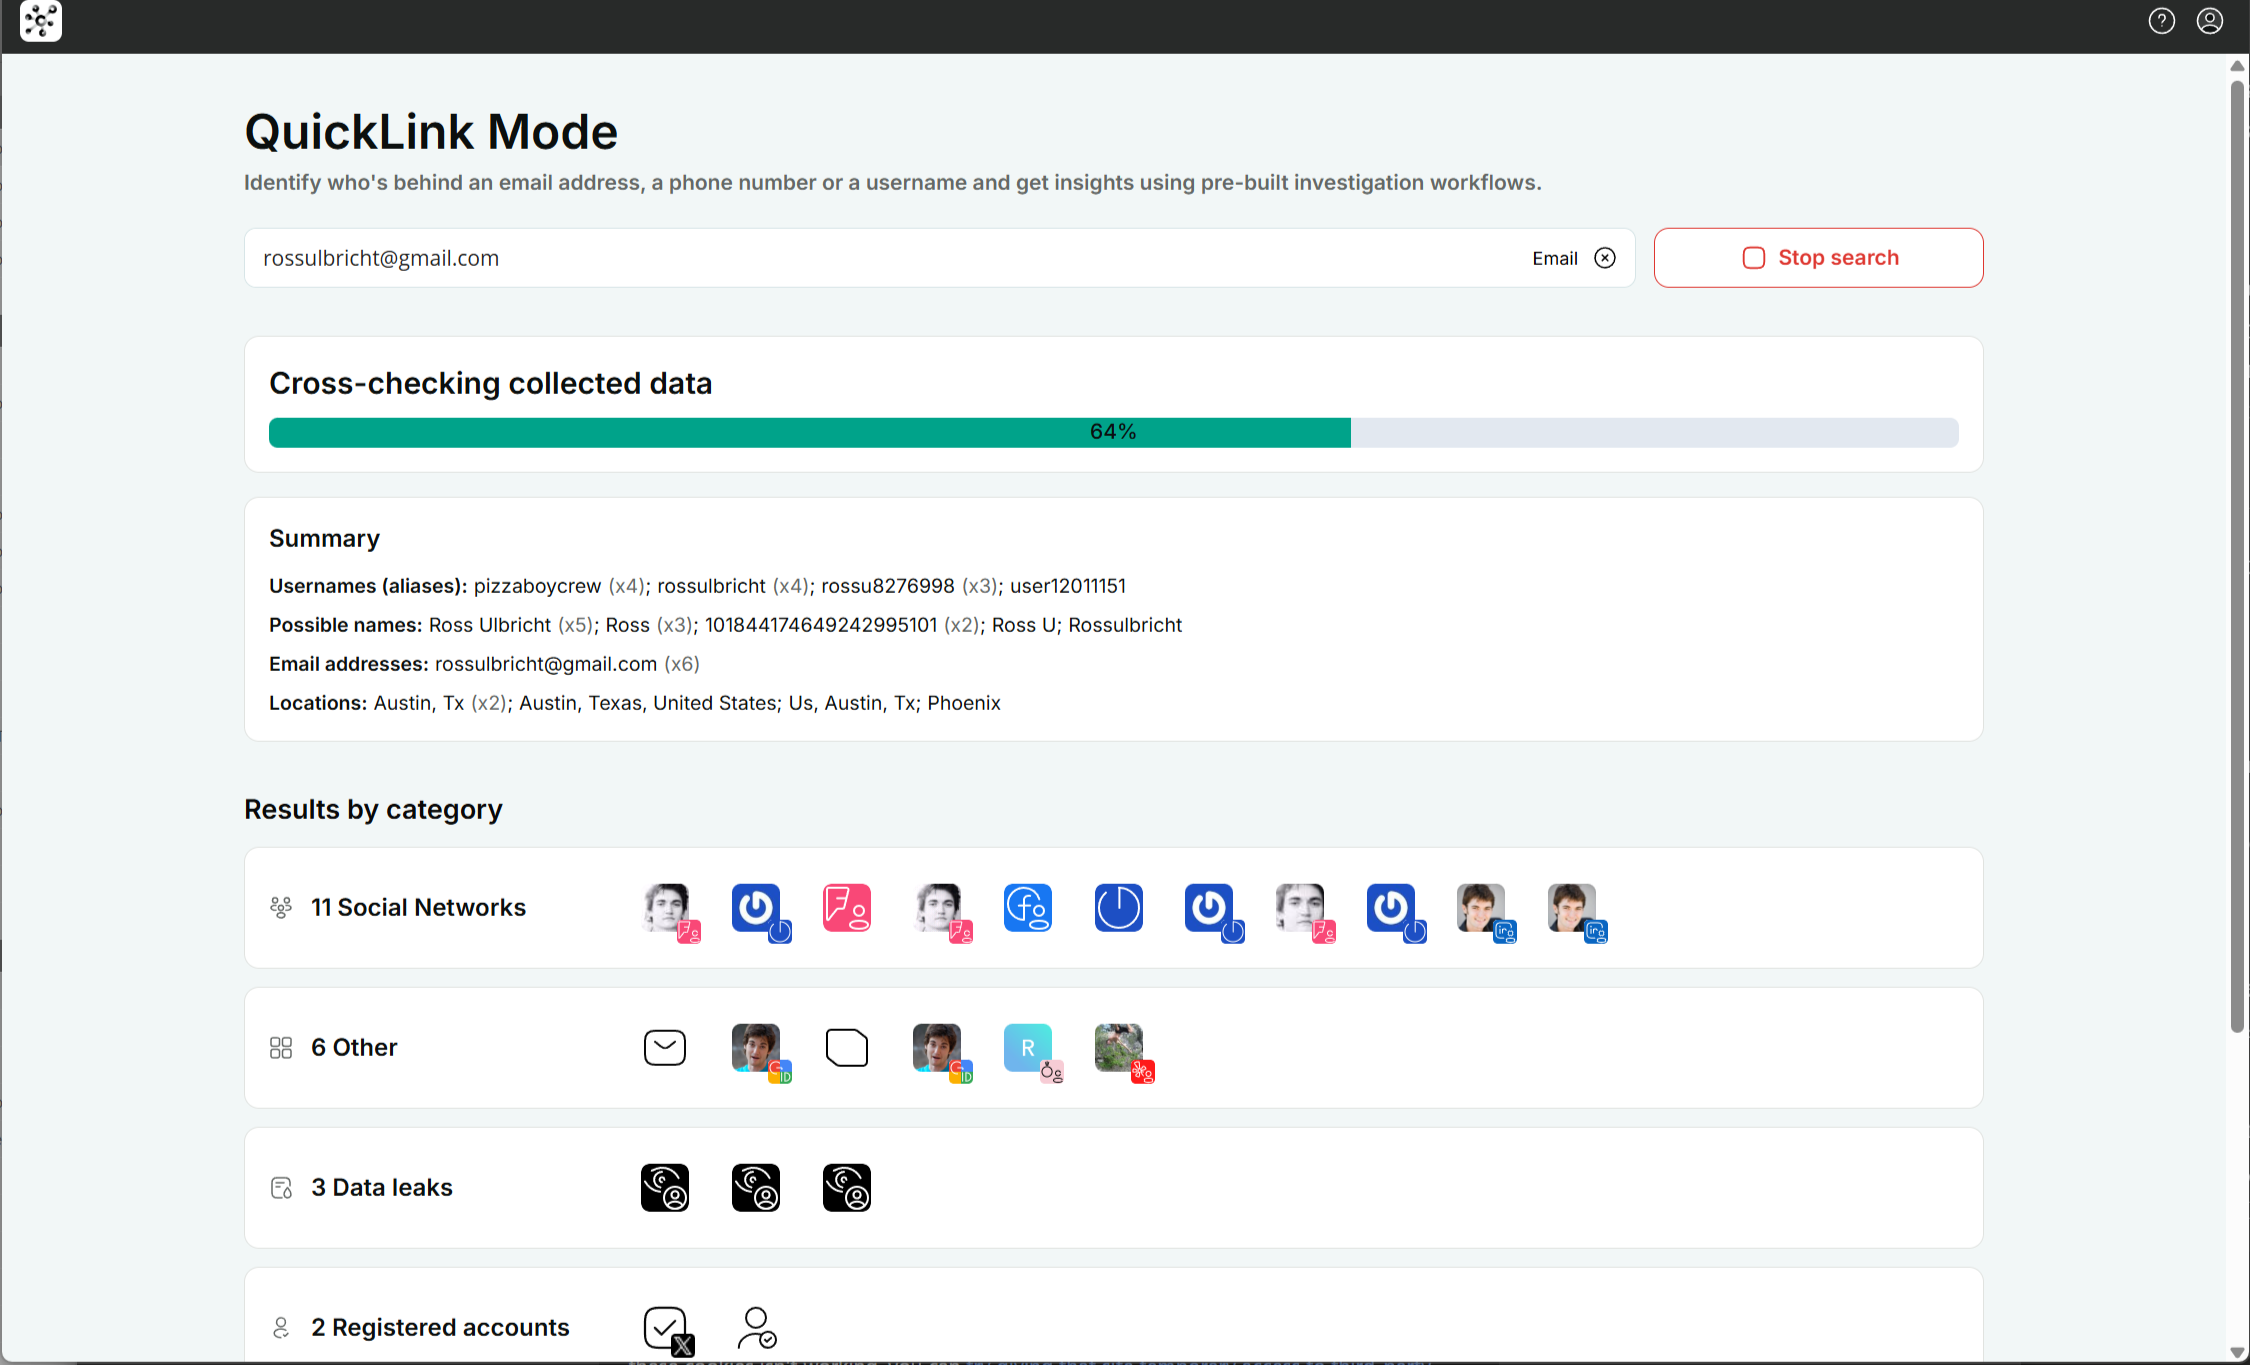
A QuickLink search runs for up to five minutes, with a stop button if you want to wrap early. If darknet access is enabled on your licence, QuickLink also reaches into breaches, infostealer logs, data leaks, and forum collections through SL ISE.
The reduced 270-source set is deliberate. QuickLink is built for speed, not completeness. Some sources return only a confirmation that an account exists; others return full profile data. The point is the structured first picture, not the exhaustive map.
When to reach for it: pre-investigation triage, vendor and counterparty screening, initial review of a tip, fast checks during an active incident. Anything where "is this worth a deeper look?" is the question on the table.
Professional Mode: the full workspace
Professional Mode is where everything else happens. Same hierarchy of dataspaces and projects, but now you have access to all 500+ sources, the full visual workspace, scripting, monitoring, and collaboration.
I tend to use both in sequence: QuickLink to decide whether a target is worth the time, then Professional Mode for the actual investigation. If you skip the QuickLink step you'll spend longer in Professional Mode than you need to.

The four views of a document
A document in Professional Mode is the same data shown four ways. You switch between them from the top bar.
Graph view
The default surface and the one you'll spend most time in. Objects are nodes, connections are edges, and you organise the canvas however the investigation needs.
What the toolbar gives you:
- Add connection. Click two objects and link them, or press
L - Layout. Several auto-arrange algorithms (Matrix Master, Ripple Flow, Star Shuffle, Node Ninja, Kaleidoscope, Elastic Link, and others). Some work better than others depending on how dense the graph is. Try a few
- Fit to screen. Snaps the zoom to show everything
- Merge duplicates. Combines nodes that share matching properties. Critical after a big sweep where the same person turned up under three different identifiers
- Node style. Customise appearance to emphasise certain entity types

Beyond the toolbar, the graph supports things that take a while to discover:
- Pin objects so layouts and merges don't move them. Useful when you want a target node fixed at the centre while everything else reorganises around it
- Custom labels. Double-click any node and type your own label. Useful for adding context that isn't in the underlying property
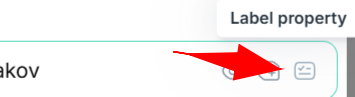
- Set this property as a label. From the right panel, you can promote any property (alias, email, ID) to be the visible label on the node
- Drag and drop images straight onto the graph from your desktop or another browser tab. They become first-class objects you can connect to other things
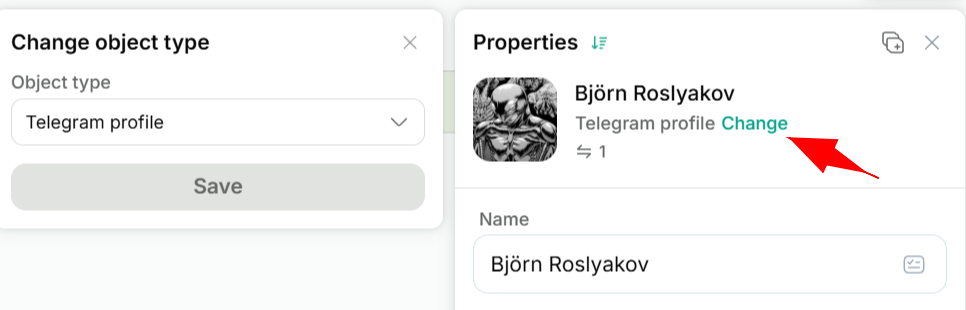
- Change object type from the properties panel if you need to run methods that only apply to a different type. The properties stay, but the object now exposes a different method set
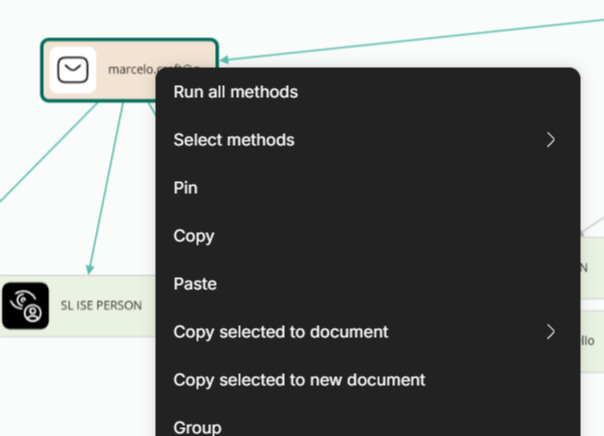
The context menu (right-click on selected nodes) is where the power lives:
- Run all methods on the selection
- Select specific methods to run
- Copy / paste / copy selected to document / copy selected to new document
- Group, ungroup, delete
Grouping is worth understanding. When a method returns more than two objects of the same type, CrimeWall auto-groups them. That keeps your graph readable instead of flooding the canvas with 200 LinkedIn profiles. You can always ungroup from the right-click menu to see individual nodes, then re-group later.
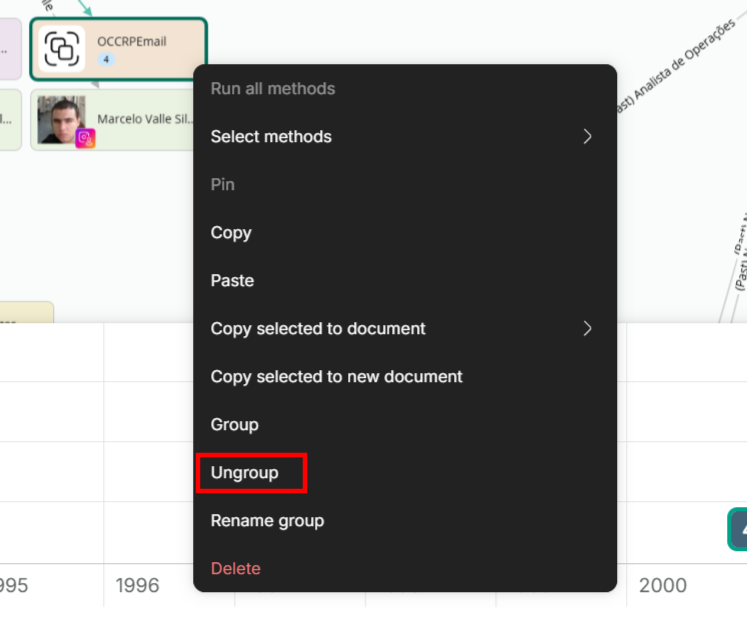
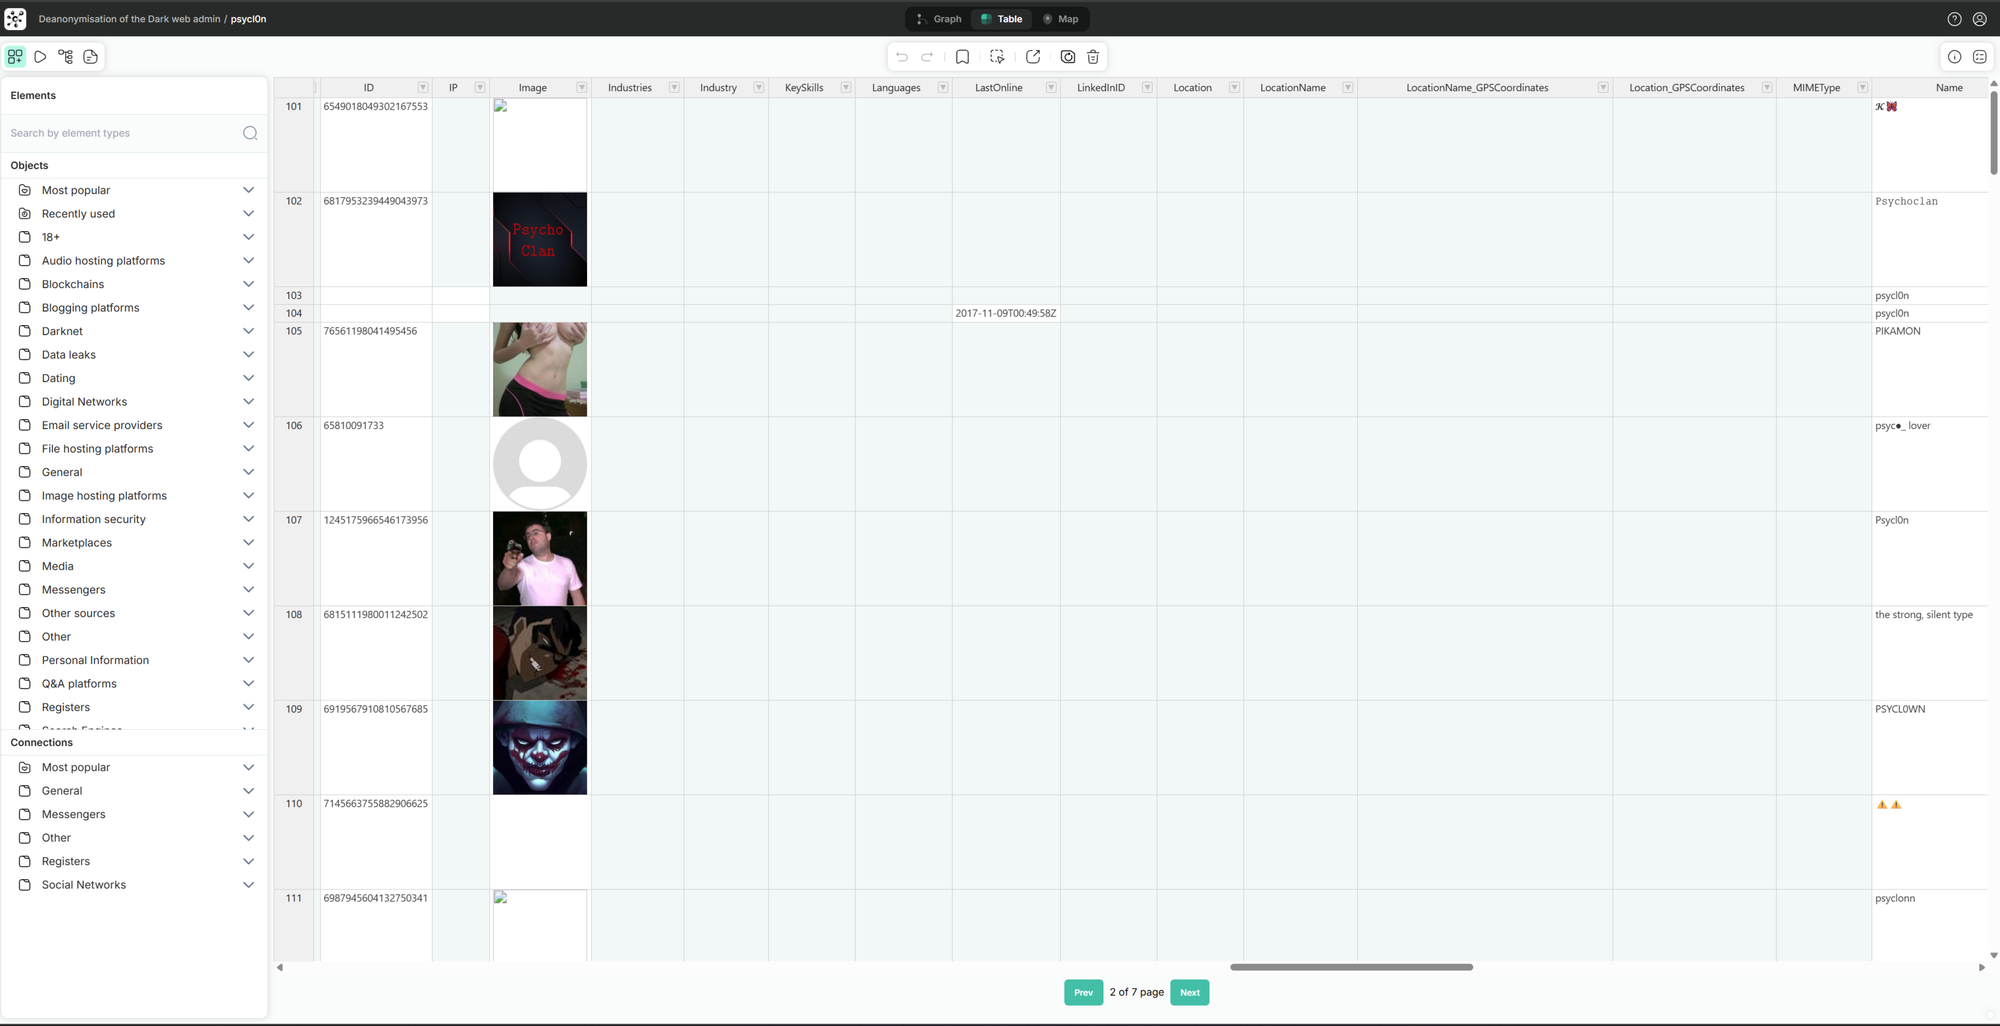
Table view
The same data, flattened into rows and columns. Best when you have a homogeneous set (suspects, IP addresses, social media posts, leaked credentials) and you want to scan attributes side by side.
You can sort, align, edit cells inline, add rows and columns, change object types from the right-click menu, bookmark rows with colour codes, and export to CSV from the toolbar.
A practical note from working in this view: the bookmark function is on the top toolbar, not in the right-click context menu. The Navigation tab also doesn't sort by date, so if you want a chronological view of records, sort by clicking the column header in Table view, not in the Navigation panel.
Map view
Anything with a location property gets a pin. Switch to map view, change map type between Scheme, Satellite, and Hybrid, and start placing or moving objects. You can also add geographic primitives directly: points, lines (paths and routes), and areas (polygons representing territories or regions).
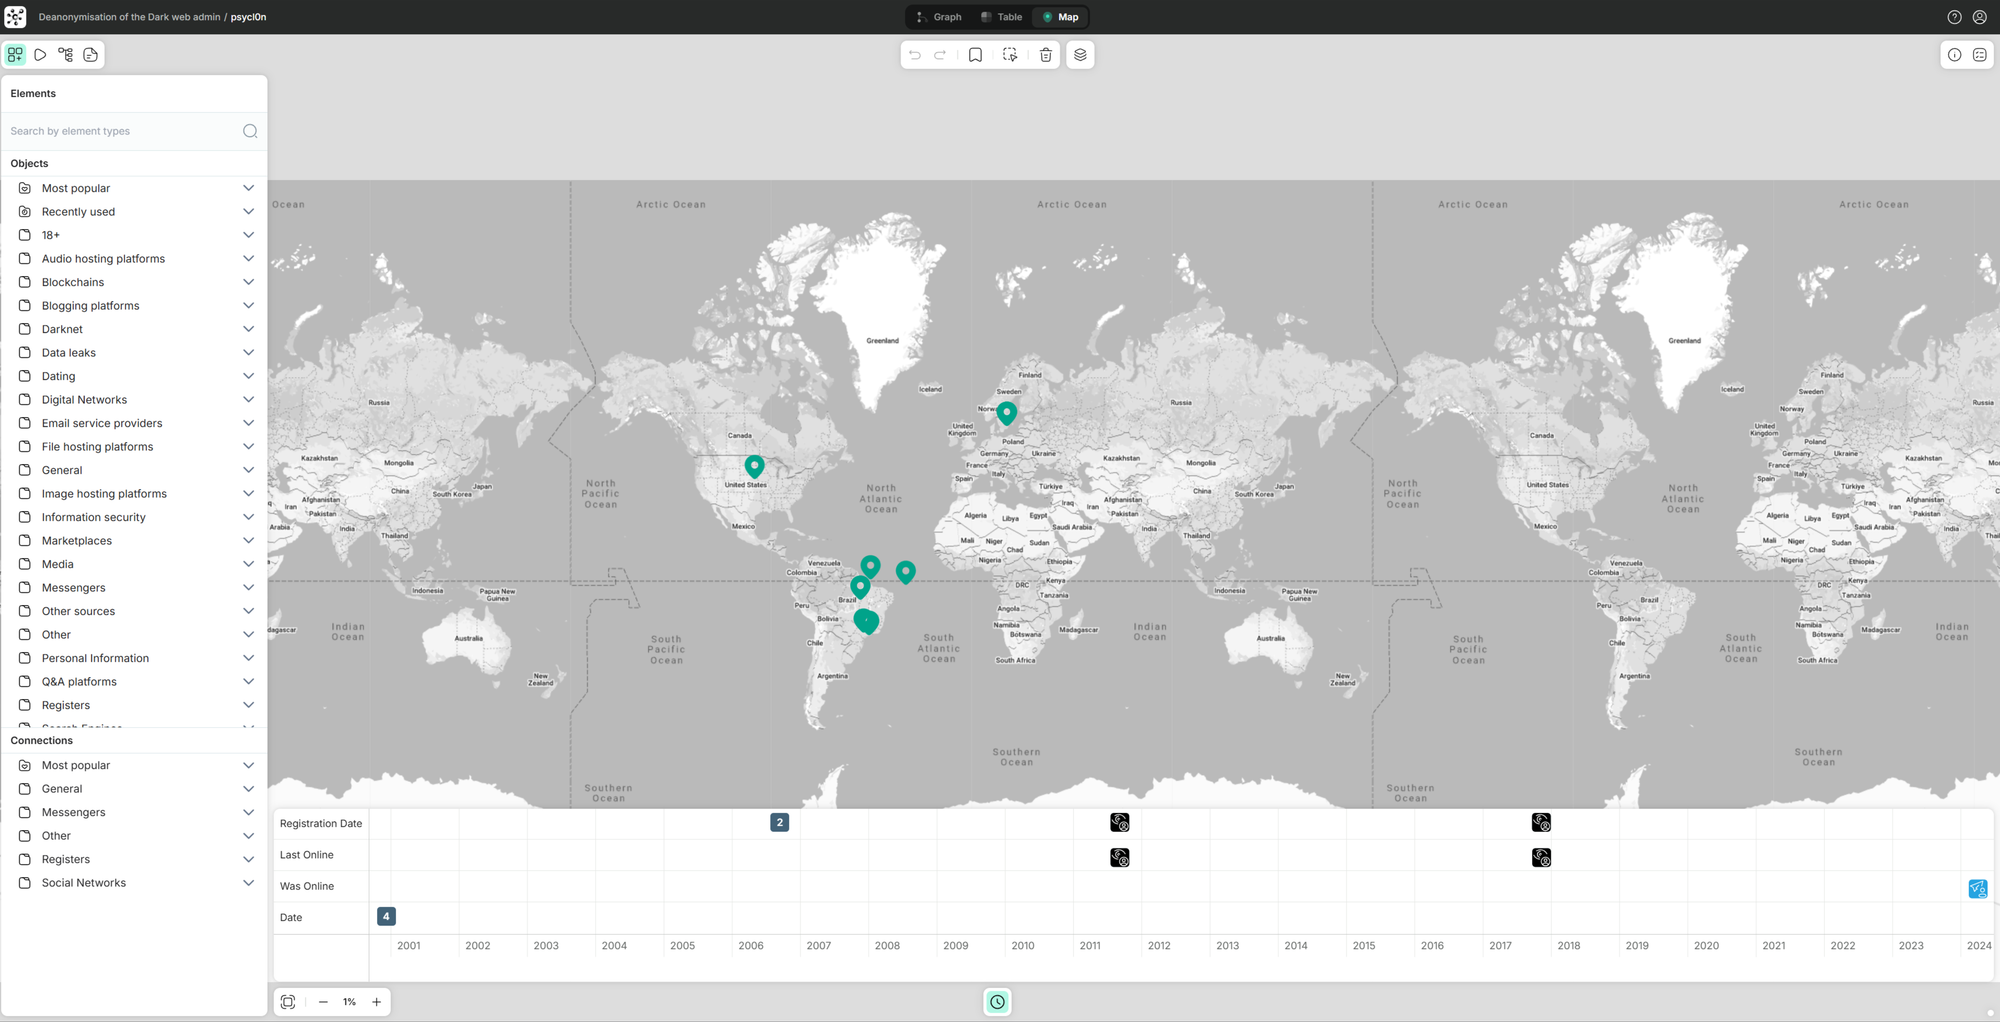
The killer combination is map view plus timeline. Geolocated events plotted in time tell stories that neither view tells alone. A subject's movement pattern, a series of meetings, the geography of a botnet's command nodes.
Content view
For text documents and images. The text viewer is a simple editor where you can select any passage and right-click to run methods using the selection as input. Useful when you've imported a dump file, a leaked document, or a Reddit thread and want to extract specific entities or run searches on excerpts.
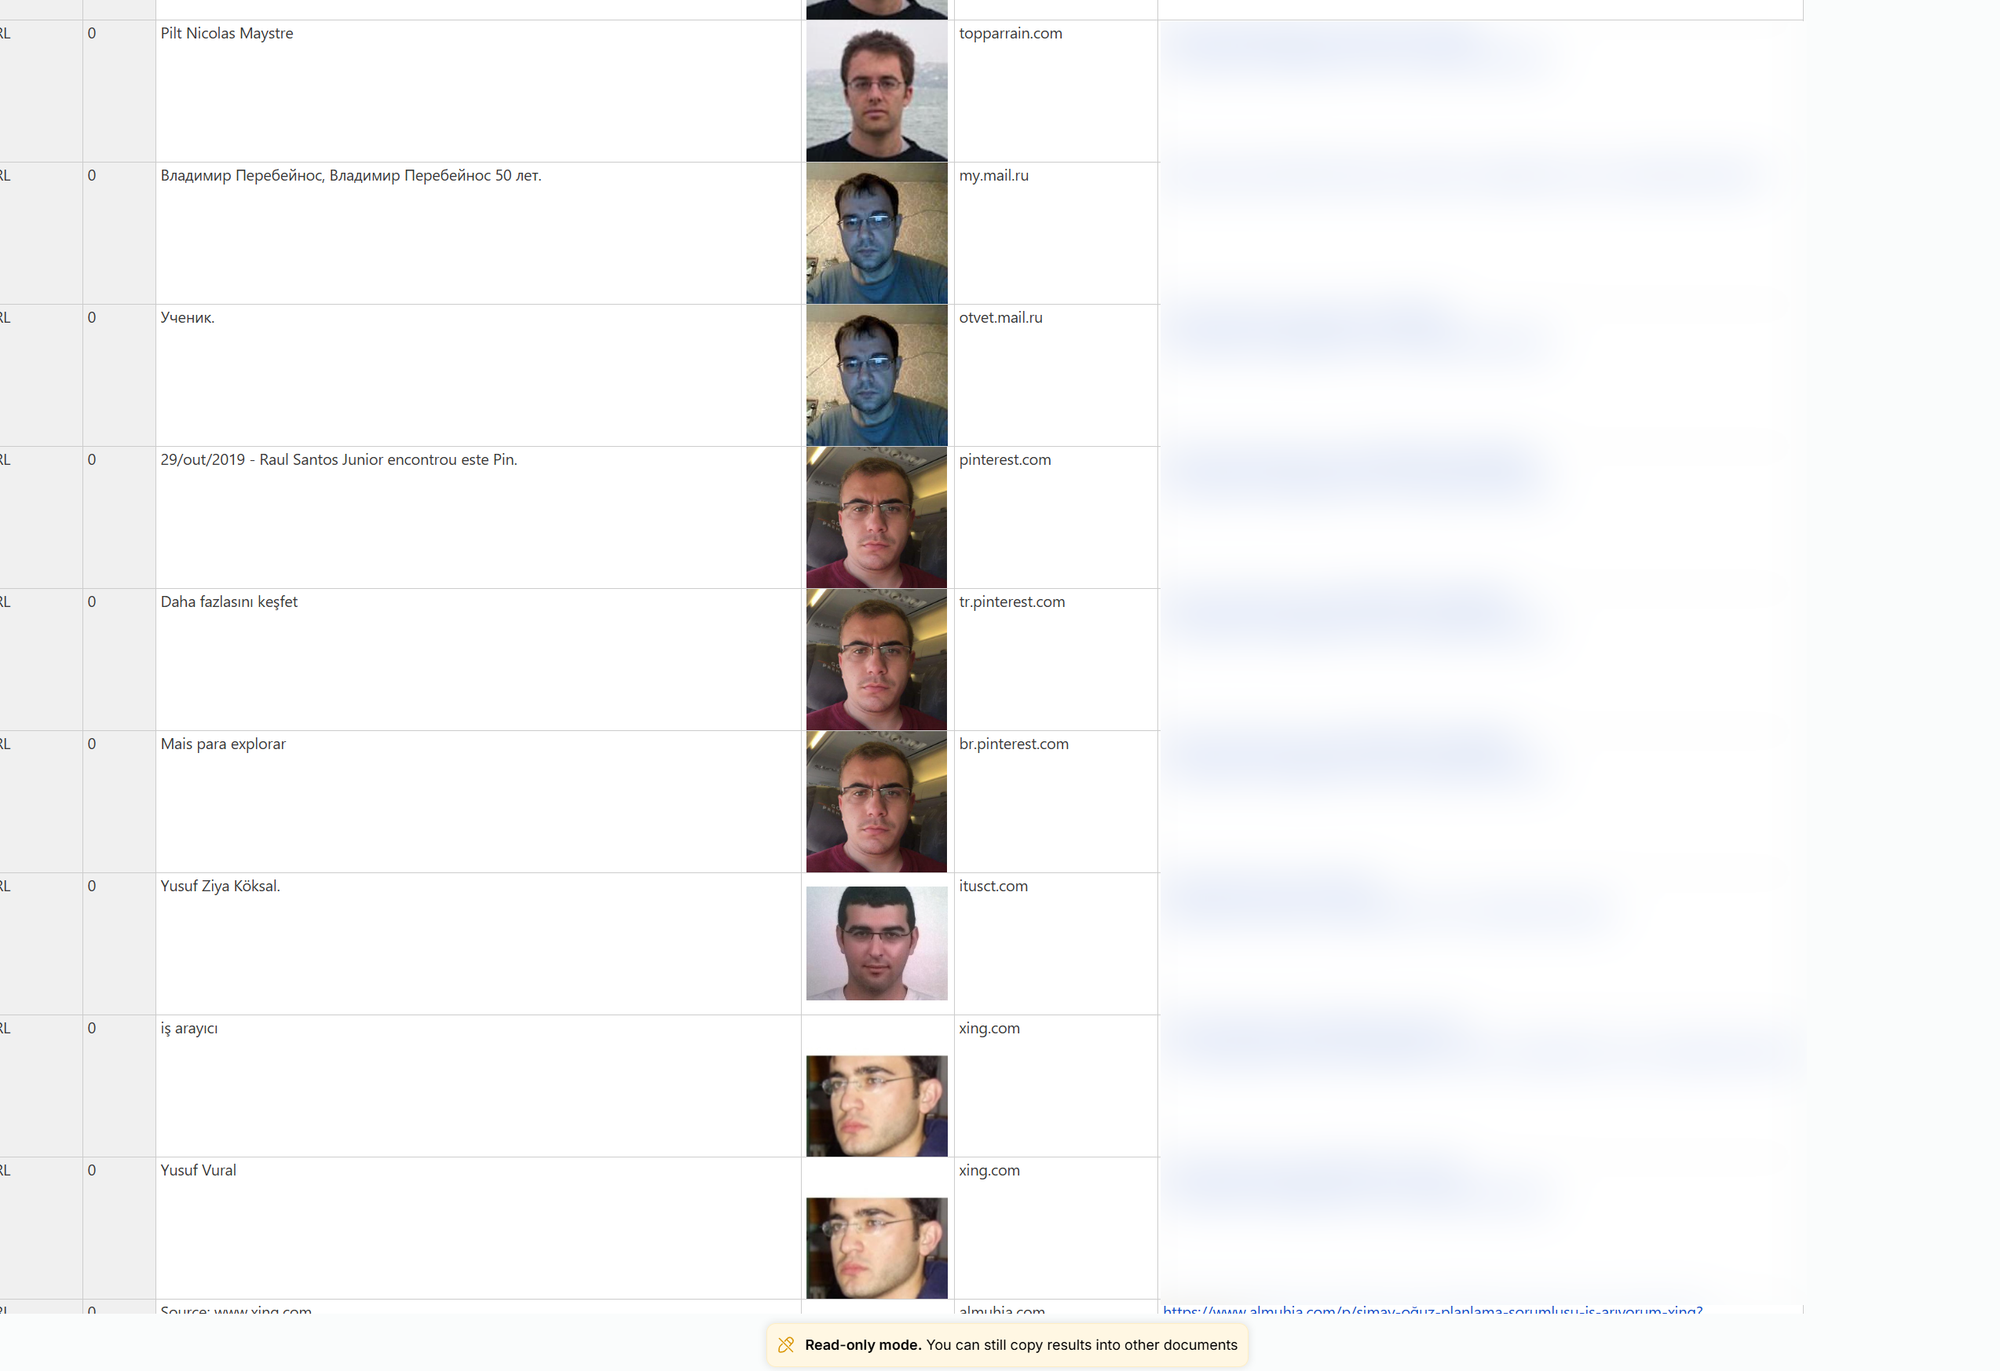
The image viewer is the more interesting one. You can pan and zoom an image, place markers on regions, and then right-click those markers to run image-recognition methods: gun detection, car detection, EXIF extraction, reverse image search, face-based searches on Facebook or LinkedIn through the relevant integrations. The marker-based scoping means you can isolate a face or an object in a busy image and run methods on just that fragment.
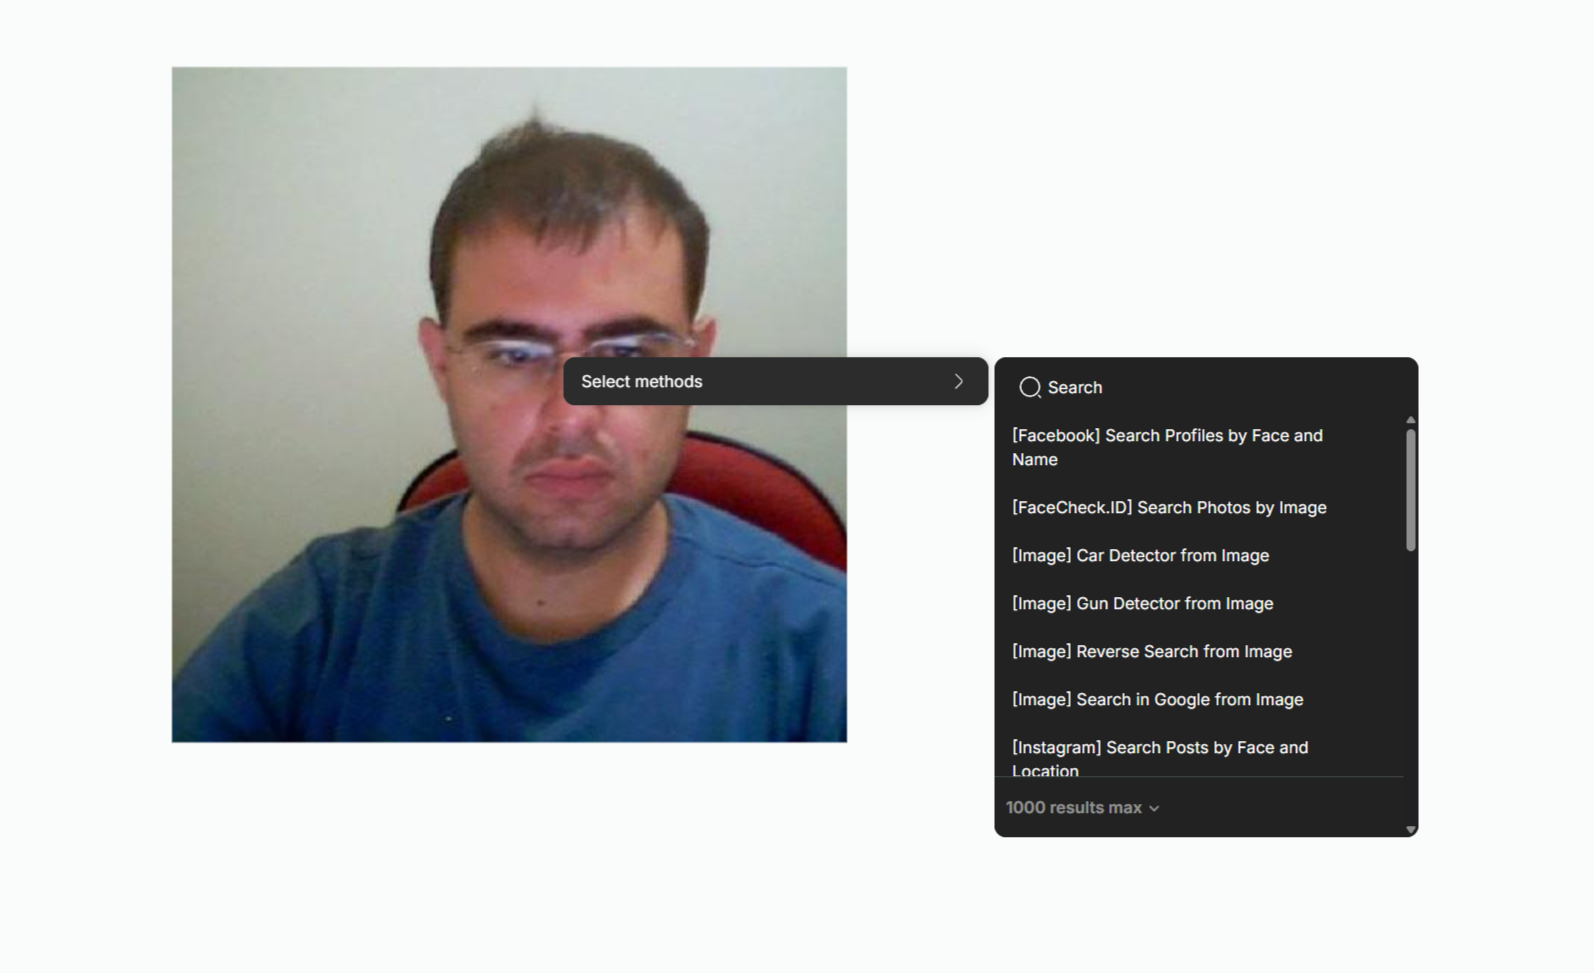
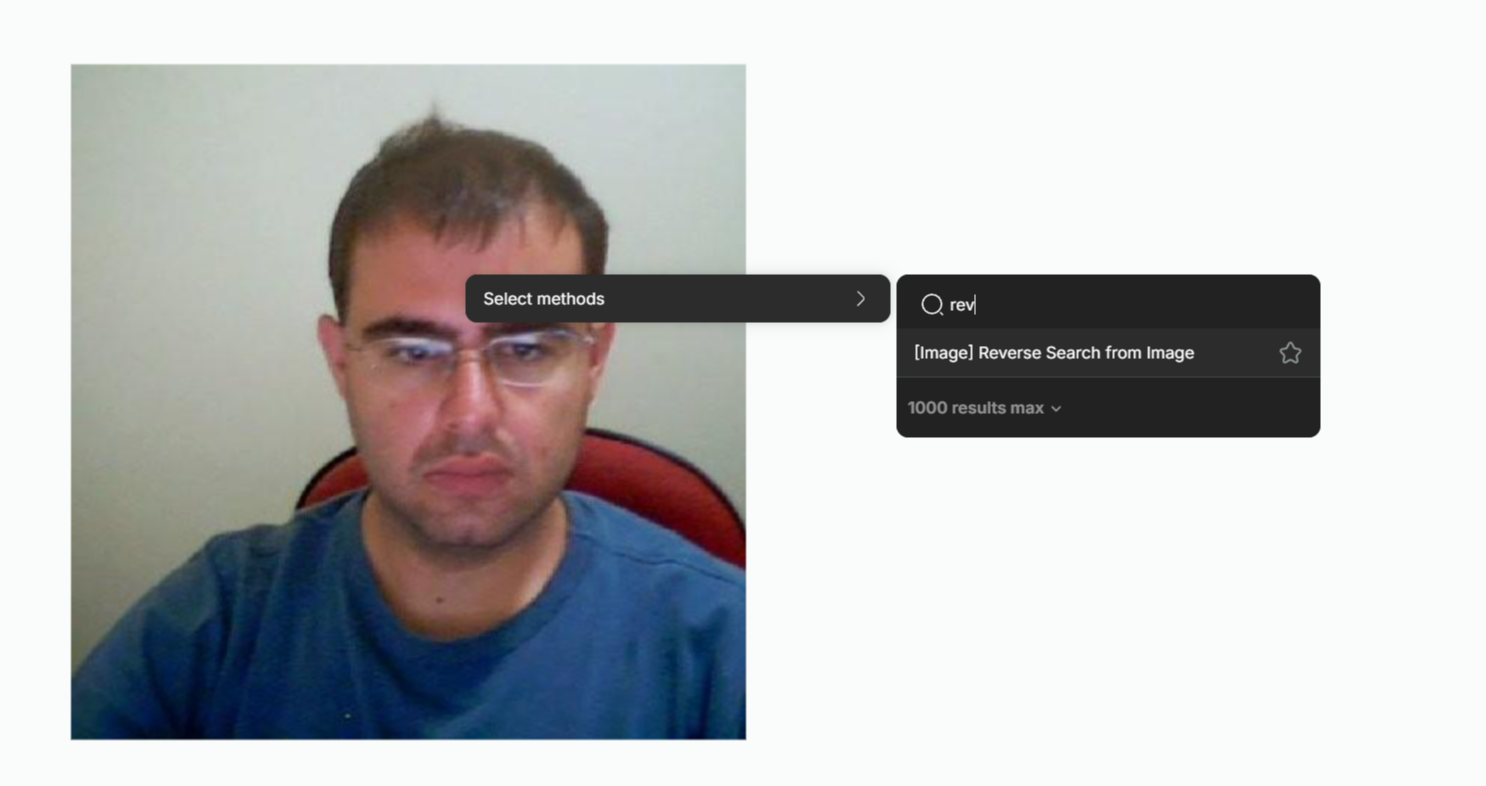
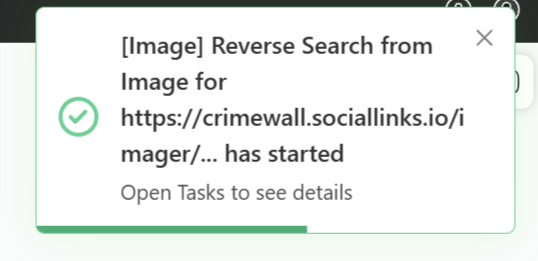
Of course, reverse search always is a hit and miss, but does give good results sometimes. Just a few results, in this case, none matched. But you get the idea.
The Navigation tab and Advanced Search
Once a document has more than a few dozen elements, the graph stops being usable for finding things. The Navigation tab in the left panel is the index.
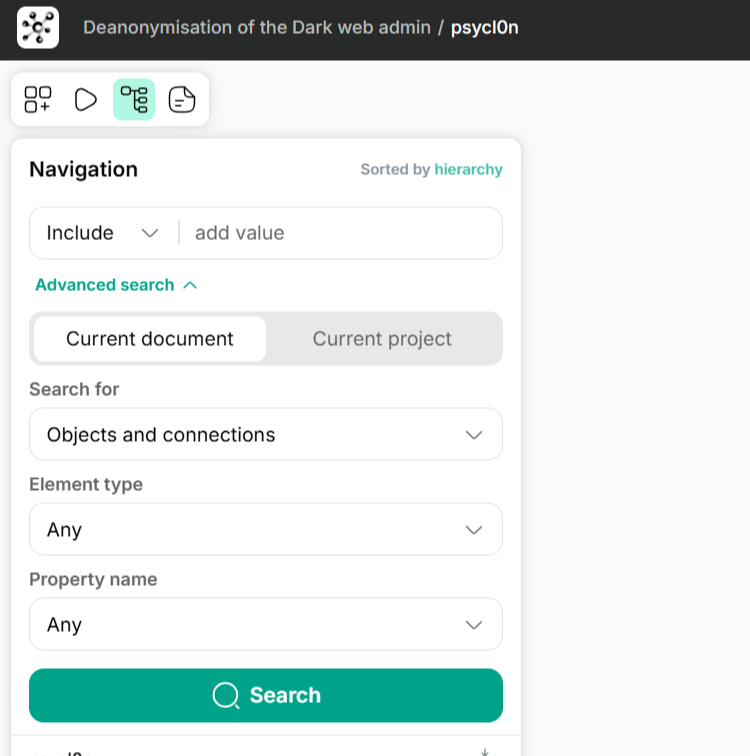
It lists every element in the document. You can sort by name or hierarchy, scroll through, click to focus on any element. The Search box at the top filters the list. For more precise work, the cogwheel icon opens Advanced Search, which is the part of the UI most users underuse.
Advanced search lets you build queries on:
- Search area (current document or current project)
- Element category (any, connections only, objects only)
- Element type (filter to LinkedIn profiles, phone numbers, locations, etc.)
- Property name (search within a specific property like "email" or "alias")
- Search criteria (logical operators)
It's worth ten minutes of practice early on. "Find every LinkedIn profile in this project where the location property contains 'Manila'" is a different kind of question than the search box at the top of the left panel can answer.
Properties and the right panel
Select any element and the right panel shows its properties. A few things in this panel that are easy to miss:
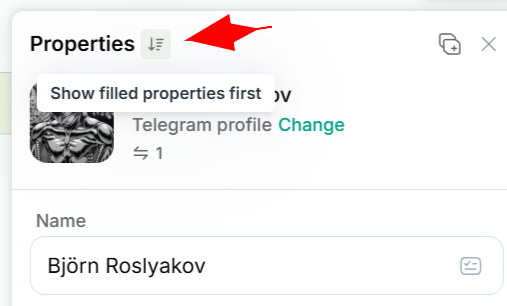
- The Filled First toggle pushes populated fields to the top, so you don't waste time scrolling past empty properties
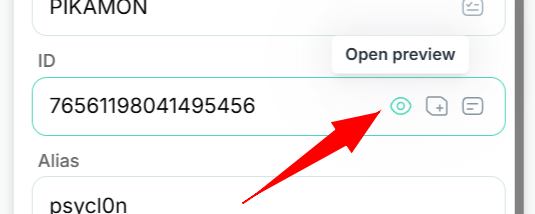
- The eye icon on a property field opens a preview. For images, this gives you a popup with an Open as Document in Content View button that creates a new document containing the image so you can mark it up and run image methods
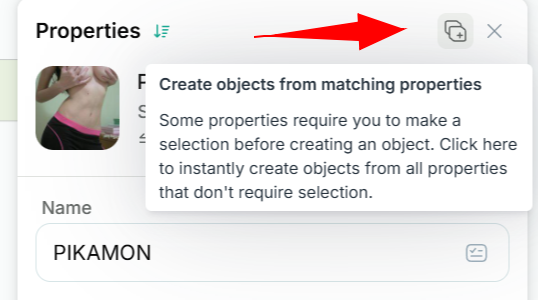
- The plus icon next to a property creates a new object from that property's value. Click the plus next to an email on a person object, and you get a standalone Email object you can pivot from
- Set this property as label sets the visible graph label
- Change object type lets you reclassify the element
The + New property button at the bottom adds a custom property to the element. Handy for analyst notes, tagging, or recording context that isn't part of the standard schema.
Methods, the task manager, and monitoring
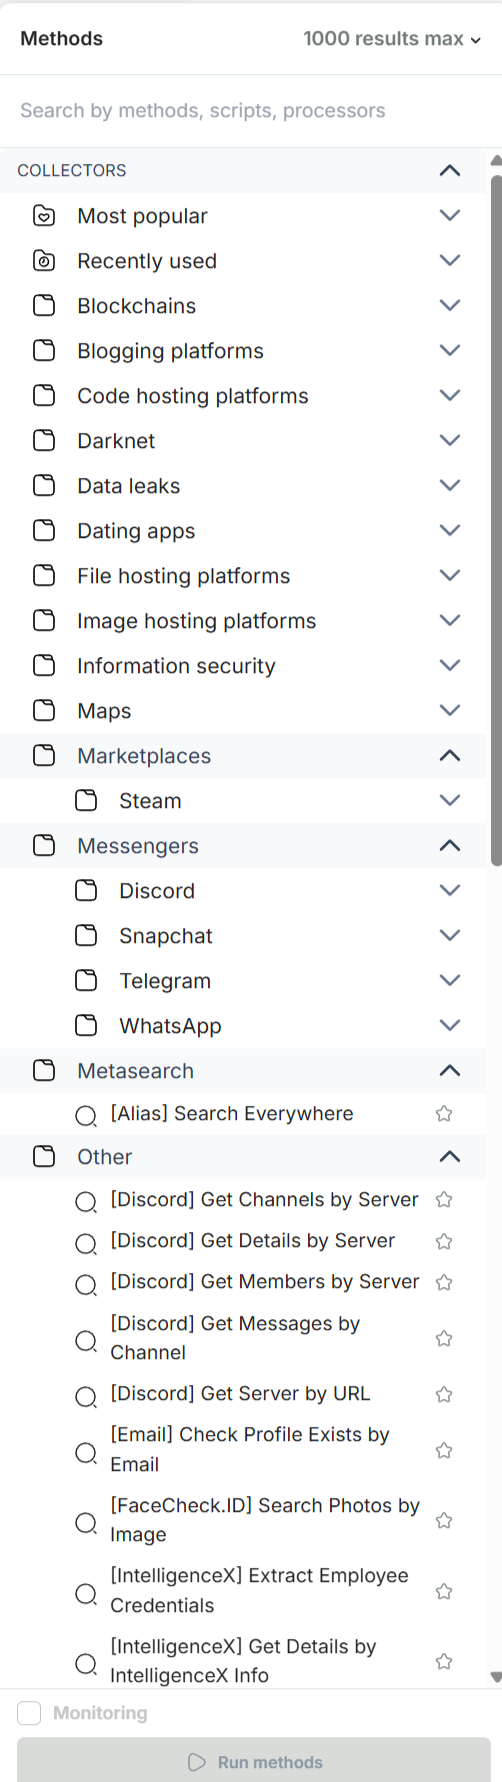
Methods is where data actually comes in. Click Methods in the bottom bar to open the panel. Categories include Collectors (sources you pull from) and Processors (transformations on existing data), plus your Scripts.
You can favourite frequently used methods with a star, set result limits per method, and configure third-party API providers to extend your method coverage.
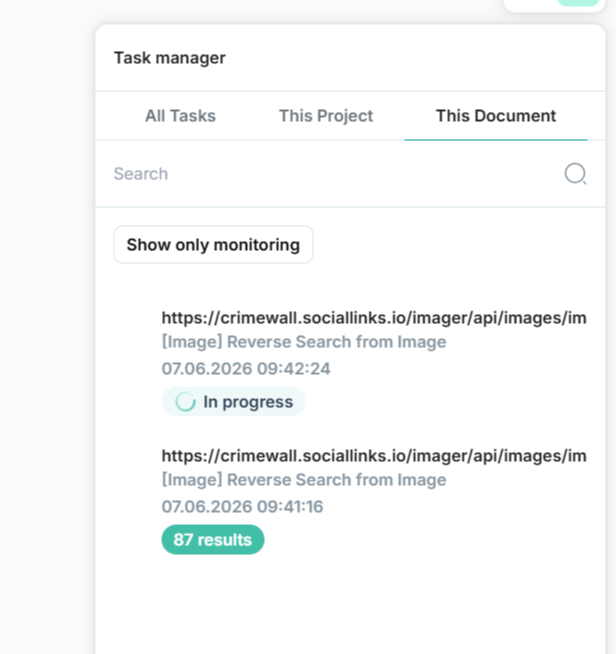
To run a method, select the element you want to use as input, choose the method, optionally adjust parameters in the Search Request panel, and click Start. The Task Manager (right panel, Tasks tab) shows you everything that's running, completed, or queued.
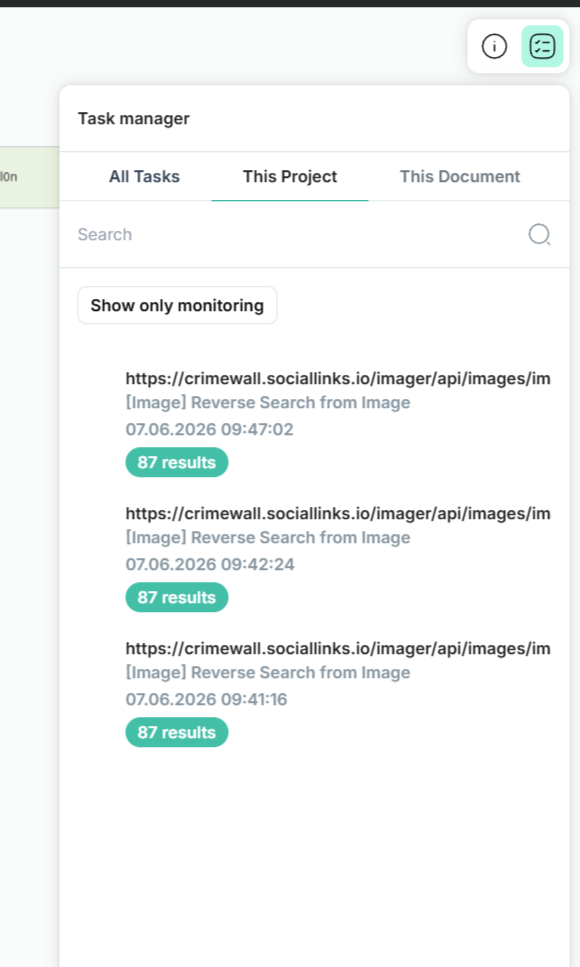
The Task Manager is more than a progress bar. It filters by All Tasks, This Project, or This Document. Each task entry shows status, method name, parameters, and the date it started. Right-click a task and you can:
- Delete the results
- Create document from result (good for keeping a noisy collector's output separate from your main canvas)
- Add results to original document (the default behaviour)
- Reload task to rerun with the same parameters
Monitoring
Each method has a Monitoring toggle in its Search Request panel. Flip it on, pick a frequency, and CrimeWall will rerun the method on a schedule, reporting only the deltas. This is how you turn a one-shot investigation into ongoing surveillance: monitor a Telegram channel for new posts, recheck a Facebook group for new members, watch a wallet for new transactions. The Task Manager shows the last check, next check, and a count of new results per run.

Focus, Bookmark, Pin, Timeline
Four small features that change the way you work once you start using them.
Focus mode. Select elements, press F or click the Focus tool, and everything else greys out. You can rearrange focused elements without disturbing the rest of the document, then exit focus to see the full picture. The selection persists across graph, table, and map views, so you can focus a group on the graph and immediately see only those rows in the table. You can also apply focus repeatedly to narrow down further within an existing focus set.
Bookmark. Press B or click the Bookmark tool to flag important objects. You can assign colours to categorise. Bookmarked items stay highlighted across all views.
Pin. Locks an object's position so layouts and merges don't move it. Drag a key entity to the centre of the canvas, pin it, then run a layout. Everything else reorganises around the anchor.
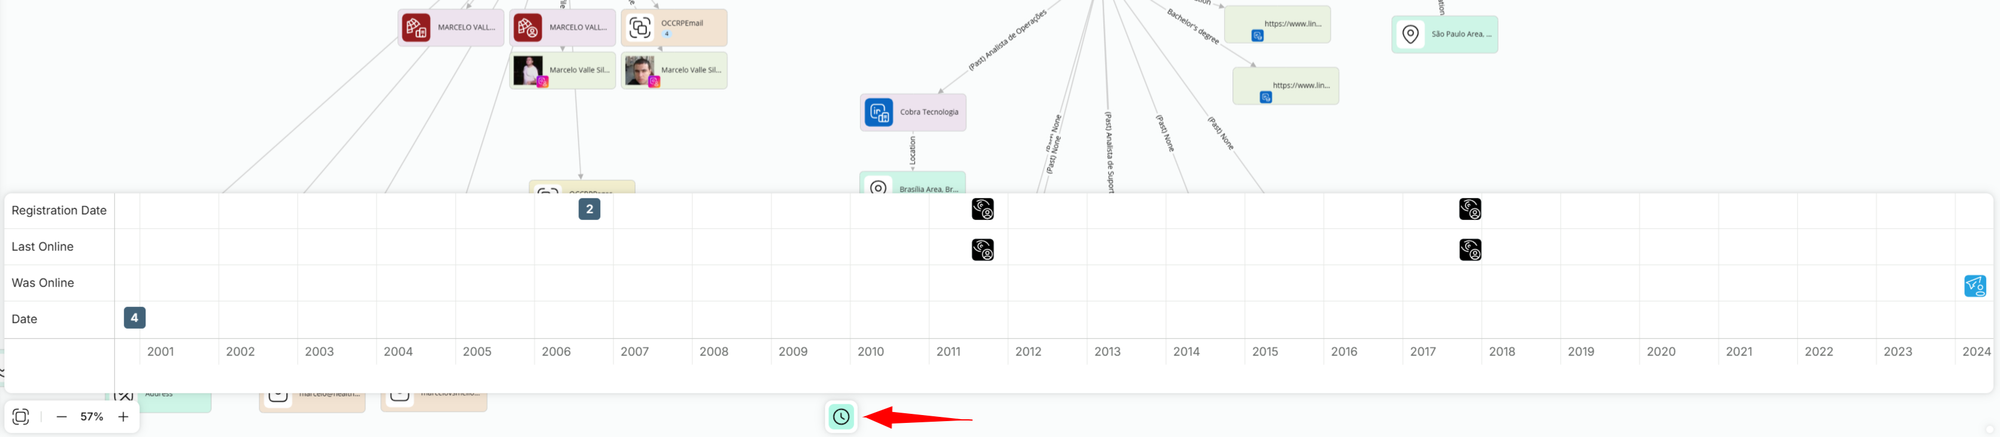
Timeline. Click Timeline in the bottom bar to open a horizontal time axis at the bottom of the screen. Every element with a date property is plotted automatically. Drag to pan, scroll to zoom. This is where temporal patterns become obvious: spikes in posting activity, clusters of registrations, periods of dormancy followed by sudden movement. Combined with the map view, you get the where and the when together.
The killer feature: Script Editor
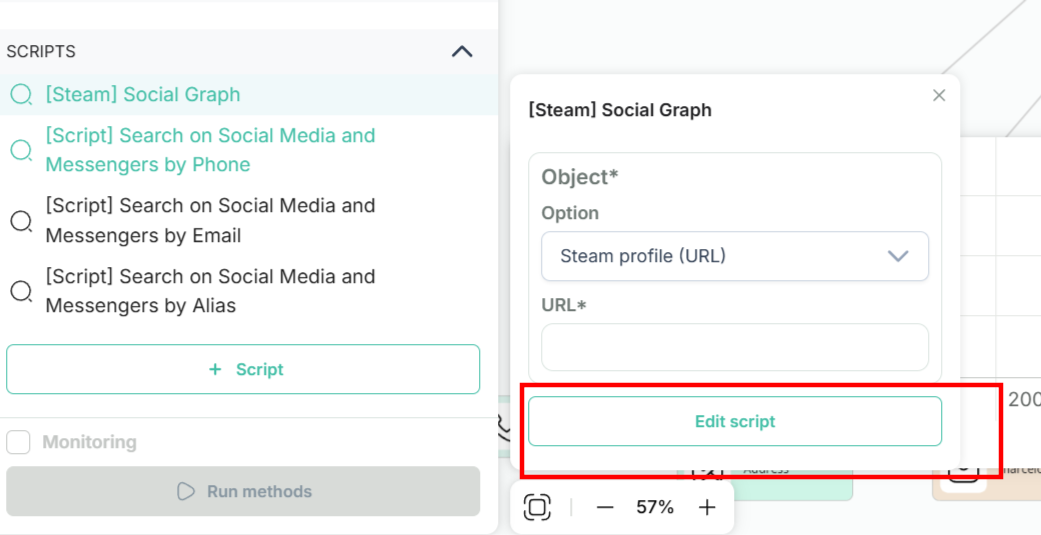
If you take only one thing away from this post, it's this. The Script Editor is the feature that turns CrimeWall from a tool into a force multiplier.
A script is a reusable pipeline that chains methods and operators into an automated workflow. Instead of running the same sequence of collectors and merges manually for every new target, you build the pipeline once and run it with one click thereafter.
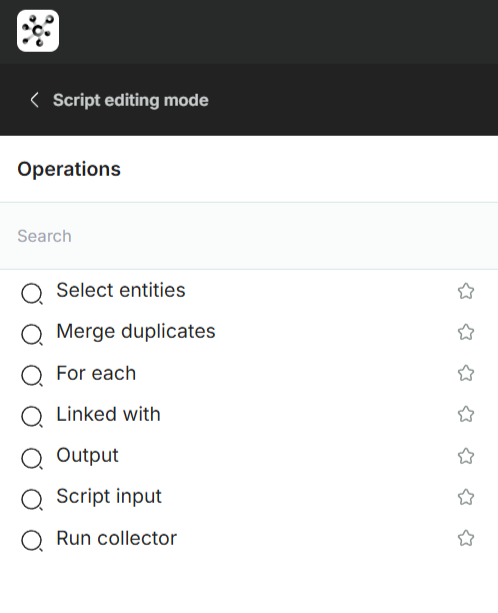
The operators
There are six operators that go into a script:
Run collector. Executes a specific method (any collector) and passes the result downstream.
Merge duplicates. Cleans up duplicate entities returned by previous collectors. There's an ignore_images parameter that controls whether image URLs should be considered when matching.
For each. Iterates over a set of returned objects and applies a method or sub-script to each. This is how you say "for every friend of this profile, get their workplaces."
Linked with. Filters a set of entities based on their connections to other entities. You specify how many links an entity must have and optionally what types of linked entities count.
Script input. Defines what the script accepts as input. Sits at the start of any script that doesn't begin with a single method. Specifies the object type and which property field is the starting point.
Output. Adds results to the script's output document. Every method whose results you want to keep must connect to an Output operator.
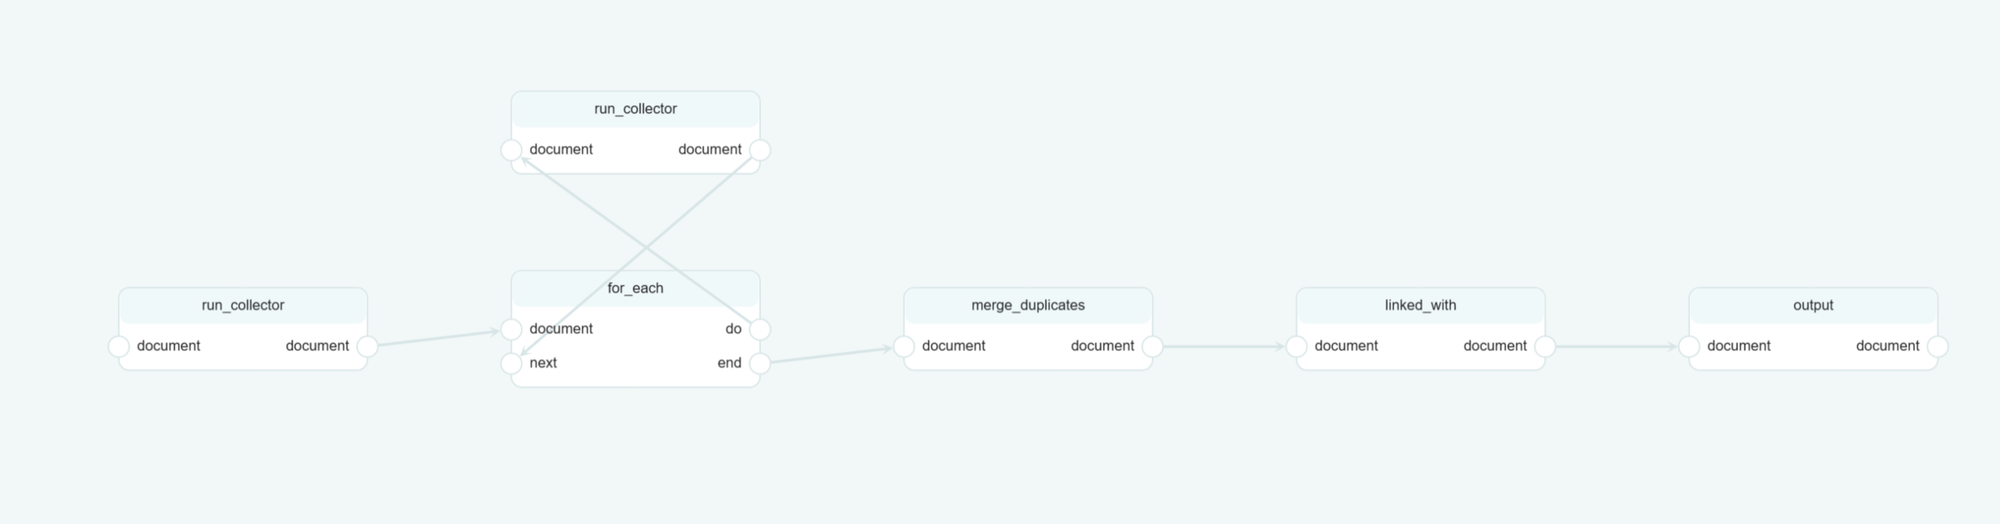
The rules
A script must start with either a single method (Run Collector) or a Script Input operator. Blocks are wired together by clicking and dragging from the output slot of one block to the input slot of the next. Each connection moves data downstream. If you connect blocks with incompatible types, you'll see an orange warning sign over the link; the script may still run but the results aren't guaranteed.
The last block in any path is always an Output operator. If you forget this, your script runs but discards everything.
Why it matters
The Script Editor is the single biggest difference between using CrimeWall as a clicking tool and using it as an investigation engine. The first time you build a working script will take you most of an afternoon. The second one takes thirty minutes. By the time you have four or five reusable pipelines (one for each common case type), your per-case time drops by an order of magnitude.
A practical starter: build a "person triage" script that takes an email or alias as input, runs your three most-used collectors, merges duplicates, filters anything not linked to a person object, and outputs to the document. Once that's working, you'll start seeing patterns in your other workflows that are obvious script candidates.
Smart Reports
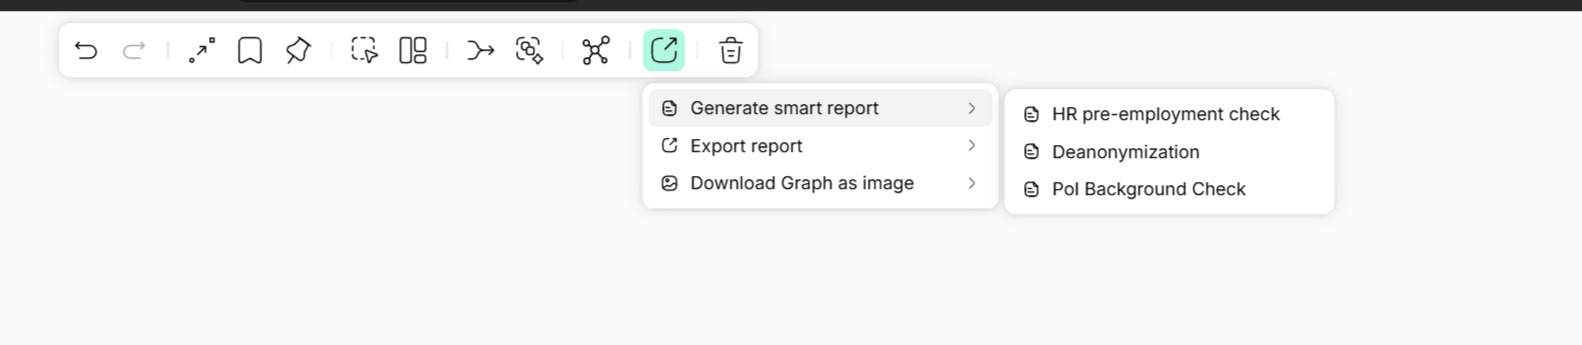
When the investigation is done, you have to hand it off. Smart Reports take a document and generate an AI-structured PDF.
Three templates ship by default:
- PoI Background Check. A comprehensive view of a subject's digital footprint. Suitable for decision-making and corporate assessments
- Deanonymization. Name says it all.
- HR Pre-Employment Check. Work-focused: employment history, education, attended events, groups, plus coherence checks across platforms
Custom templates are available on request through Social Links support. If you have a house style or a mandatory format from your client or organisation, you can have it built.
To generate, press Ctrl + E (or Cmd + E on macOS) or click the Export button in the toolbar and pick the report type. The system processes asynchronously and emails you the PDF when it's ready, which can take up to five minutes depending on the size and complexity of the graph.
You can also export raw report data and CSV from the same Export menu in any view.
Collaborative Mode
Real-time multi-user editing on the same document. Multiple investigators see each other's changes as they happen.
To enable it, open a project, click Share in the top-right corner (the project must contain at least one document for the button to activate), enter the email addresses of the people you want to invite, and click Invite. Each invitee needs an active CrimeWall licence under that email. You can also generate a shareable link instead.
Once accepted, everyone in the session can view and edit. Changes appear instantly.
Useful when you have specialists. One person handles social media, another handles infrastructure, a third handles financial flows, and they all converge in the same document.
Since this is not a feature available on my account, nothing to show.
Manager Dashboard
Hidden behind the profile icon (top right, then Switch to manager panel) is a supervisory interface for team leads. It centralises audit and governance information across all users on the licence.
My licence doesn't include Manager Dashboard access, so the description below is based on the platform documentation rather than hands-on use. I'll write a deeper piece once I have it available.
Three sections, per the documentation:
Team Activity. A filterable log of every user action: who did what, when, in which project. Useful for compliance audits and for reconstructing what happened during an active investigation.
Sessions. Active and completed user sessions with start time, end time, duration, and originating IP address.
Users. The full user roster with last-active timestamps, account creation dates, and quick links to per-user activity and session histories.
If you operate under any regulatory framework that requires audit trails (financial compliance, law enforcement chain of custody, internal corporate governance), this surface is where you demonstrate them.
Since this is not a feature available on my account, nothing to show.
Third-party integrations and the API key question
CrimeWall ships with a large number of built-in collectors that work out of the box. Beyond those, the platform integrates with a set of external data providers that require you to bring your own API keys.
The current supported integrations include GitHub, OSINT Industries, Pipl, IntelligenceX, WhoisXML, Darknet (Leaks, Stealer logs, Searches), FaceCheckID, and others. To add a key: click your user icon, choose Third-party integrations, paste the key into the popup. Once saved, the relevant collectors and processors become available in your method list.
This catches some new users off guard. The platform subscription covers CrimeWall itself: the workspace, the orchestration, the visualisation, the built-in sources. It does not cover third-party data licences. WhoisXML, OSINT Industries, IntelligenceX, FaceCheckID are separate services with separate billing.
It's the same model Maltego runs on, and it's the industry standard for OSINT platforms, but it's worth knowing upfront so you can budget appropriately. A practical starter pack:
- WhoisXML free tier for historic WHOIS (good enough for most cases)
- GitHub personal access token, free, two minutes to set up
- IntelligenceX free tier for occasional darknet and leak checks
- OSINT Industries Intermediate plan if your case mix needs broader account discovery than the built-in social collectors deliver
Skip Pipl, FaceCheckID, and Darknet add-ons until a specific case justifies them.
Where to go next
If you're new to the platform, the practical order I'd suggest:
- Open the Demo Cases in your Documents panel and spend an hour clicking through them before doing anything else. They show finished investigations and you'll absorb a lot of structural patterns
- Run a QuickLink on a known identifier (yourself, a public figure, a test alias). Get a feel for the output shape and what makes it into the Smart Summary
- Open the result in Professional Mode and walk through all four views (graph, table, map, content) to anchor the data in your head
- Use the Advanced Search to filter by element type and property. This is how investigations with hundreds of nodes stay navigable
- Build one Smart Report so you've seen the deliverable side
- Build your first script. Don't try to make it clever. Three Run Collectors, a Merge Duplicates, and an Output. That's enough to understand how scripts feel before you start designing real ones
The next post will be a real case study using the platform end to end. I've been running a multi-stage crypto scam investigation through CrimeWall and the post will showcase wallet pivoting, darknet cross-referencing, and a Smart Report from real evidence. If you want a heads-up when it goes live, the newsletter signup is at the top of the page.